
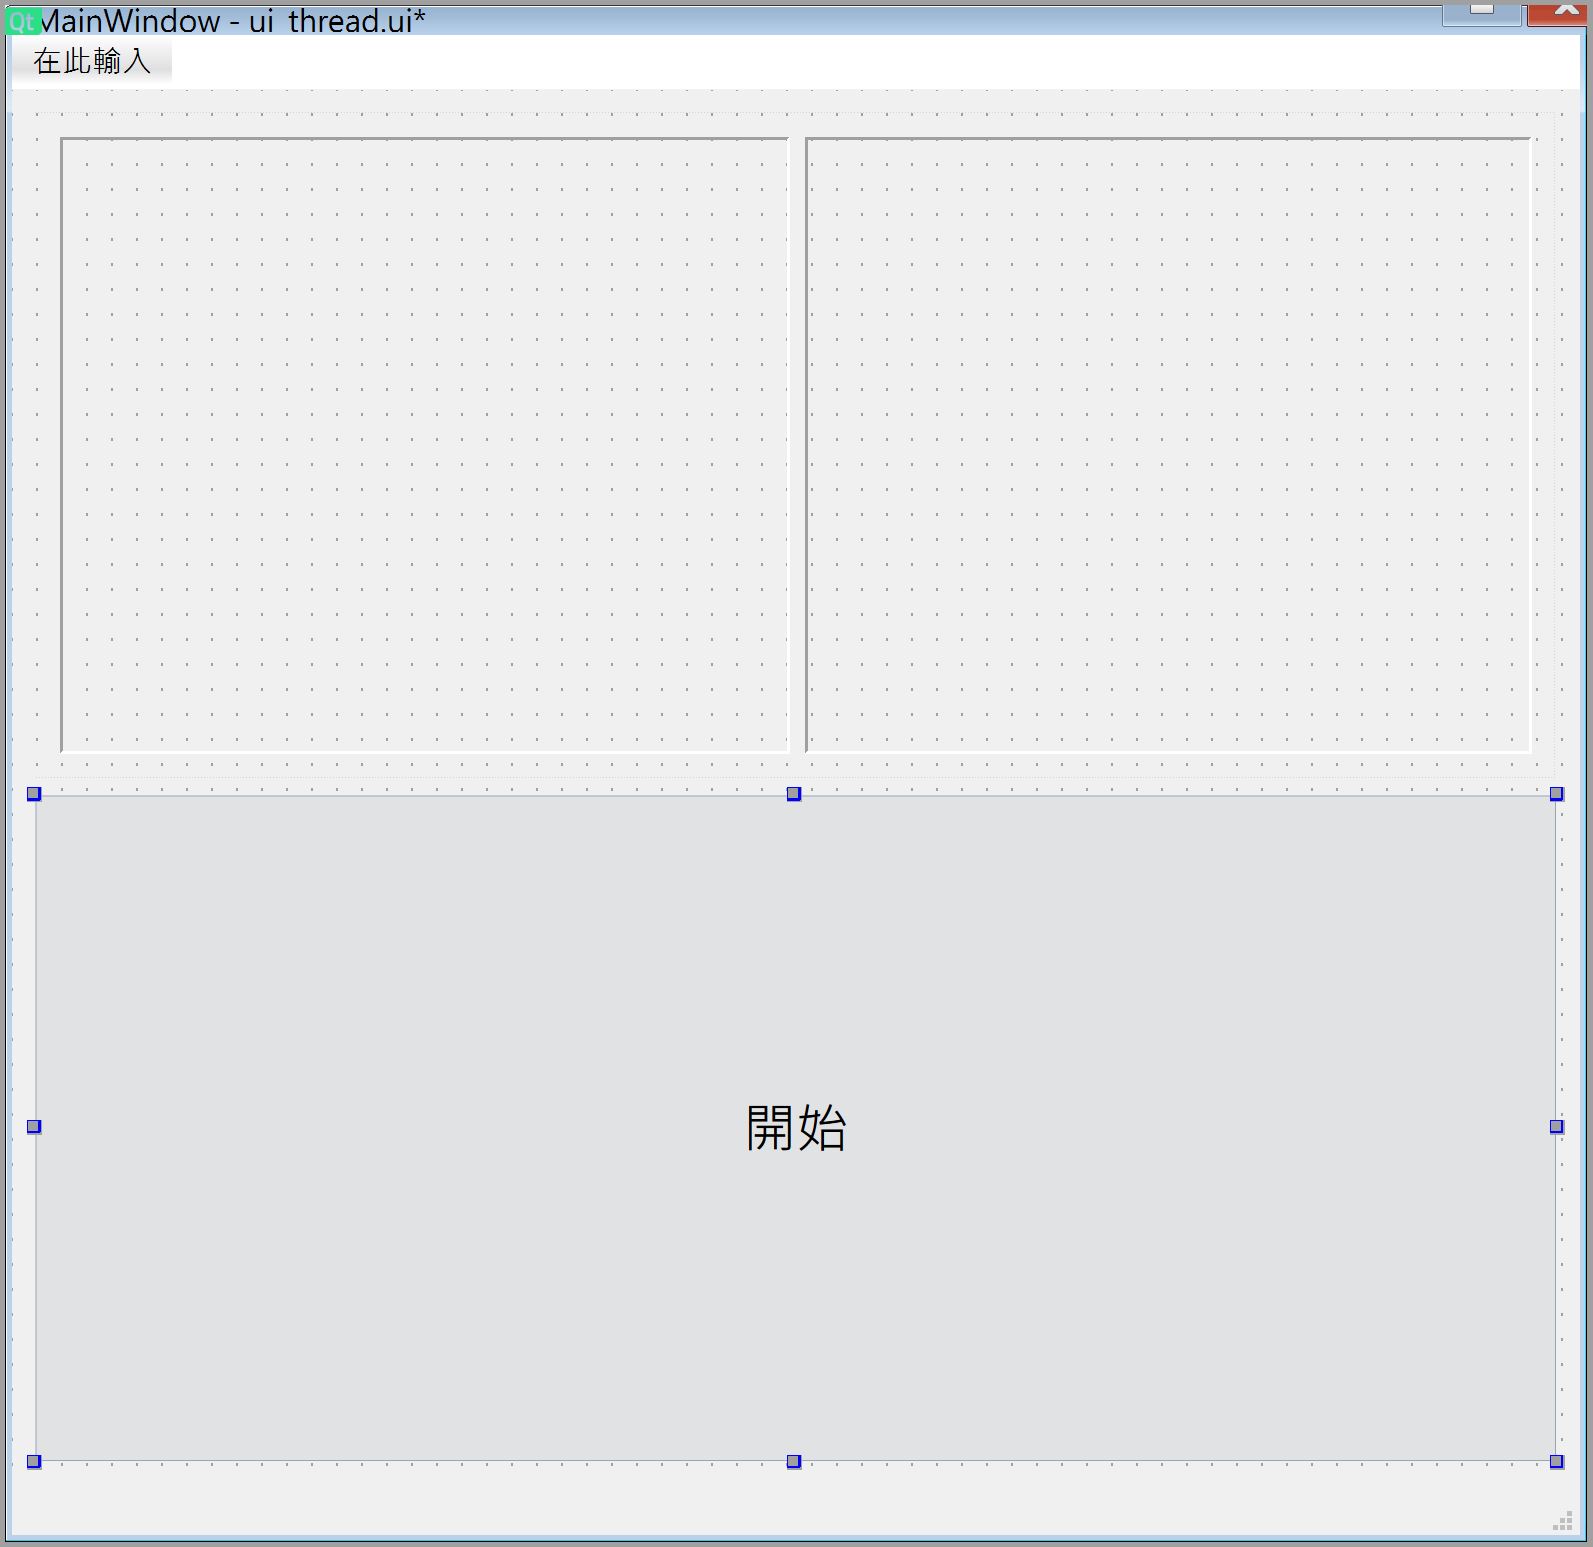
執行緒的觀念不太好懂,本例以左右二個 Label,同時執行計數器的功能。左邊每隔 10 ms 計數一次,右邊每隔 100 ms 計數一次。
UI 介面下載
請使用 Qt Designer 設計如下 UI 畫面,或由 ui_thread.ui 下載,然後置於專案下的 ui 目錄下。
Thread 執行緒
Thread 中文翻譯為執行緒,每支程式最少會有一個執行緒,最多會有上千上萬個執行緒。
可以把每支程式當成是一間公司,公司的第一個員工就是老闆,又稱為主執行緒,而其它的員工,就是新執行緒。
每個視窗程式就是一間公司,老闆 (主執行緒) 負責視窗的監控,比如滑鼠的位置,或是按下 “x” 時關閉視窗,而主執行緒最煩重的任務就是更新視窗的畫面。
啟動新執行緒
在 MainWindow 中,就是由主執行緒負責視窗,裏面的 btn_click 方法,產生 CountThread 物件 self.t1,然後設定新執行緒 self.t1.callback 回傳訊息時要執行的方法 self.t1_callback。
最後要使用 t1.start() 啟動新執行執行 t1 的 run 方法。請注意,雖說 t1.run() 也可以執行,但這是使用主執行緒執行 run,而不是使用新執行緒。
class MainWindow(QMainWindow, Ui_MainWindow):
    def __init__(self, parent=None):
        super().__init__(parent)
        self.setupUi(self)
        self.btn.clicked.connect(self.btn_click)
    def btn_click(self):
        self.t1=CountThread()
        self.t1.callback.connect(self.t1_callback)
        self.t1.start()
    def t1_callback(self, msg):
        self.lbl1.setText(msg)
    def closeEvent(self, event):
        self.t1.runFlag=False
        self.t2.runFlag=False
        time.sleep(1)
        print("close window")
app=QApplication(sys.argv)
mainWindow=MainWindow()
mainWindow.show()
app.exec()
CounterThread
新執行緒要執行的任務寫在 CounterThread 的 run 方法中。
在類別中有一個 callback 類別變數,可以把此變數當成是一支電話,此電話由 Signal() 產生。當執行建構子時,在建構子內會將此類別變數轉成物件變數,然後賦予 emit 的功能。所以在 run 方法中,就需以 self.callback 來調用,然後用 emit 方法將訊息傳回主執行緒。
from PySide6.QtCore import QThread, Signal
class CountThread(QThread):
    callback=Signal(object)
    def __init__(self, parent=None):
        super().__init__(parent)
        self.runFlag=True
    def run(self):
        index=0
        while self.runFlag:
            index+=1
            self.callback.emit(str(index))
            self.msleep(100)
    def close(self):
        self.runFlag=False
主程式完整代碼
本例的主程式 MainWindow.py 完整代碼如下
import sys
import time

from PySide6.QtWidgets import QMainWindow, QApplication
from CountThread import CountThread
from ui.ui_thread import Ui_MainWindow
class MainWindow(QMainWindow, Ui_MainWindow):
    def __init__(self, parent=None):
        super().__init__(parent)
        self.setupUi(self)
        self.btn.clicked.connect(self.btn_click)
    def btn_click(self):
        if self.btn.text()=="開始":
            self.btn.setText("結束")
            self.t1=CountThread()
            self.t1.callback.connect(self.t1_callback)
            self.t1.start()
            self.t2=CountThread(delay=100)
            self.t2.callback.connect(self.t2_callback)
            self.t2.start()
        else:#結束新執行緒
            self.btn.setEnabled(False)
            self.t1.close()
            self.t2.close()
            time.sleep(1)
            self.btn.setText("開始")
            self.btn.setEnabled(True)
    def t1_callback(self, msg):
        if self.t1.runFlag: #防止最後一次回調
            self.lbl1.setText(msg)
    def t2_callback(self, msg):
        if self.t2.runFlag:
            self.lbl2.setText(msg)
    def closeEvent(self, event):
        self.t1.close()
        self.t2.close()
        time.sleep(1)
        print("close window")
app=QApplication(sys.argv)
mainWindow=MainWindow()
mainWindow.show()
app.exec()
CountThread 完整代碼
CountThread.py 的完整代碼如下
from PySide6.QtCore import QThread, Signal
class CountThread(QThread):
    callback=Signal(object)
    def __init__(self, parent=None, delay=10):
        super().__init__(parent)
        self.delay=delay
        self.runFlag=True
    def run(self):
        index=0
        while self.runFlag:
            index+=1
            self.callback.emit(str(index))
            self.msleep(self.delay)
    def close(self):#結束新執行緒
        self.runFlag=False