
學習率的問題
學習率的大小對梯度下降的搜索過程影響非常大,太小搜索速度慢,太大又可能跳過極值。上述手動選擇學習率的方式,稱為SGD 隨機梯度下降法,每次的學習率都是固定的。手動選擇適當的學習率往往要花費不少時間,所以可以用如下三種方式自動幫我們選擇學習率
1. 衰減因子
2. 引入動量
3. 自動調整學習率(自適應梯度策略,又稱為優化器 Optimizer)
學習率衰減因子
把初始學習率預設為 1,然後依迭代的次數,逐步減少。迭代公式如下
$(lr_{i} = \frac{lr_{0}}{(1.0 + decay * i)})$
$(lr_{0})$ 為初始學習率,decay 為衰減因子,i 為第 i 次迭代,$(lr_{i})$ 為第 i 次迭代所計算出來的學習率。
衰減因子愈小,衰減率會愈大,就會更快接近極值。但此時的初始學習率亦必需設定大一點,如果初始學習率設太小,衰減愈不明顯。底下是 Python 完整代碼
#衰退因子 : 一開始比較快,後面愈來愈慢
import numpy as np
import pylab as plt
def f(x):
    return np.square(x)
def df(x):
    return  2 * x
def bias(a, x):
    b=f(x)- a * x
    return b
x=np.linspace(-5, 5, 100)
y=f(x)
current_x=-5
traces=[current_x]
epochs=500
lr=0.2
decay = 0.1
fig=plt.figure(figsize=(9,6))
ax=plt.axes()

for i in range(epochs):
    ax.clear()
    ax.set_xlim(-10,10)
    ax.set_ylim(-5,30)
    plt.plot(x,y)
    plt.scatter(traces, f(traces), c='r')
    a=df(current_x)
    b=bias(a, current_x)
    x_l=current_x-3
    x_r=current_x+3
    line_x=[x_l, x_r]
    line_y=[a*(x_l)+b, a*(x_r)+b]
    plt.plot(line_x, line_y, c='orange')

    #基本
    #current_x = current_x - a * lr

    #衰減因子
    lr_i = lr / (1 + decay * i)
    current_x = current_x - a * lr_i
    traces.append(current_x)

    plt.pause(0.01)
plt.show()
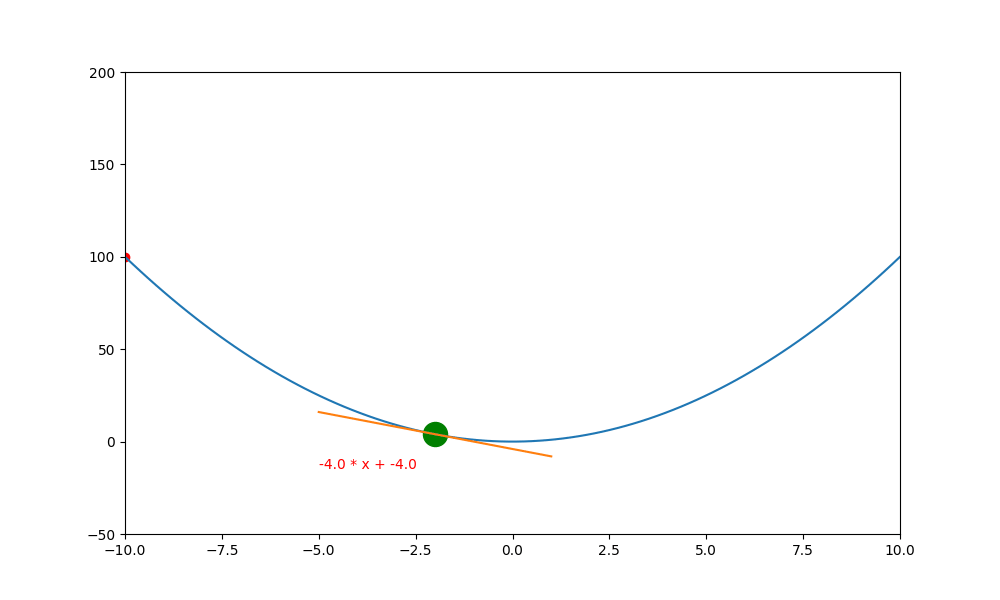
底下是初始學習率 0.4 ,decay 為 0.99 所執行的圖解。
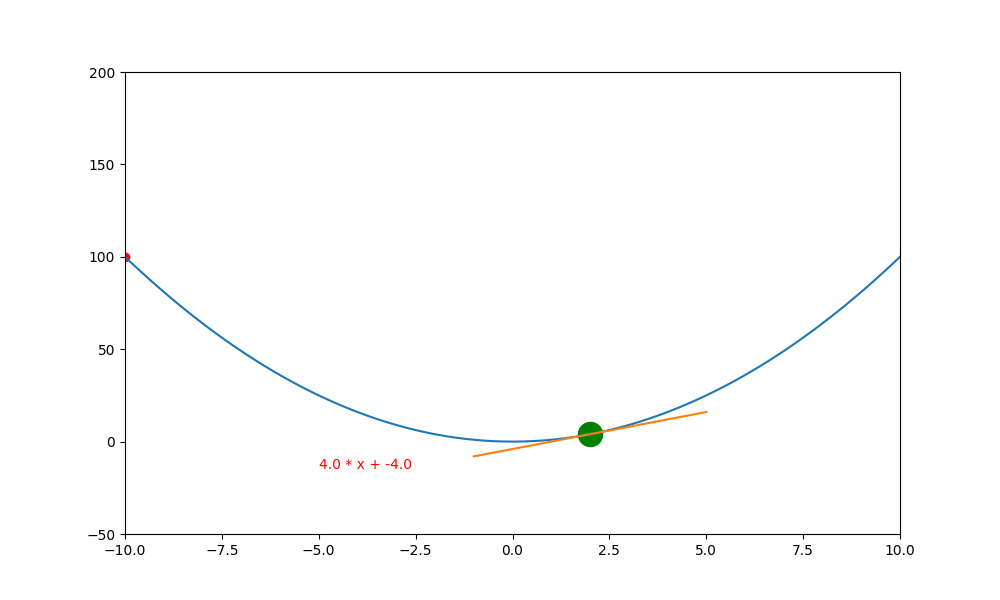
底下是初始學習率 0.6 ,decay 為 0.99 所執行的圖解, 一下就找到極值。如果初始學習率設定為 0.5 ,則會更快,馬上就不動了
引入動量
物理學的動量定義為 質量 * 速度,也就是 m * v。一開始設定 v = 0 (一開始不動),然後每次迭代 v = x.grid * lr + m * v * u,u 是摩擦力系數,每次移動時的縮小系數。
底下是 Python 代碼。
import torch
import pylab as plt
import numpy as np
def f(x):
    if torch.is_tensor(x):
        return torch.square(x)
    else:
        return torch.square(torch.tensor(x))
allx = np.linspace(-5, 5, 100)
ally=f(allx)

fig=plt.figure(figsize=(9,6))
ax=fig.subplots()
epochs=200
lr = 0.05
m = 1 #質量
v = 0 #速度
u = 0.9 #摩擦力系數
x=torch.tensor([-5.], requires_grad=True)
history=[]
for i in range(epochs):
    y=f(x)
    y.backward() #計算微分,將值存於 x.grad 中
    nx = x.item() #取得 x 的值
    history.append(nx)
    with torch.no_grad():
        a = x.grad.numpy()[0]
        #原始無動量
        #x -= x.grad * lr

        # 計算動量
        v = x.grad * lr + m * v * u
        #計算下一步
        x -= v
        x.grad.zero_()
    b=f(nx) - a * nx
    ax.clear()
    plt.plot(allx, ally, c='b')
    plt.scatter(history, f(history), c='r')
    ax.set_xlim(-10, 10)
    ax.set_ylim(-2, 35)
    xl = nx - 2
    xr = nx + 2
    plt.plot([xl, xr], [a * xl + b, a * xr + b], c='orange')
    plt.text(-4.0,30,
             f"epoch : {i+1}, x={x.detach().numpy()[0]:.5f}, y={f(x).detach().numpy()[0]:.5f}",
             fontsize=10)
    plt.pause(0.01)
plt.show()
下圖是執行後的結果,可以看到就好像一顆圓球,滑入一個凹槽中,然後來回左右滾動。所以如果想要製作這種模擬現實生活中滾來滾去的動畫,加入動量是最好的方法。
動量的作用,其實就是在平滑之處,有鼓力量將現在的位置往前推(慣性),讓它越過目前的門檻。當然啦,如果動量不足以跨不出目前的門檻,還是會被打回而卡住。
所以引入動量的方法,只是去探測未來的高度是否還是跟往惜一樣的平坦,用此動能衝看看,如果可以跨過就往前,如果跨不過去就反彈。
鞍點無動量
加入動量的重要性如下。當一個函數有鞍點且使用傳統學習方式時,就會卡在局部最小值中,無法突破
import numpy as np
import pylab as plt
#y = x^4 - 60x^3 - x + 1
def f(x):
    x=np.array(x)
    #因值很大,所以除以 shrink 縮小 y 值
    y=(np.power(x,4) - 60 * np.power(x,3) - x + 1) / shrink
    return y
def df(x):
    return (4*np.power(x,3) - 180 * np.power(x,2) -1 ) / shrink
def bias(a, x):
    return f(x)- a * x

shrink = 1e6
x=np.linspace(-30,60,100)
y=f(x)
current_x = x[00]
traces=[current_x]
plt.figure(figsize=(9,6))
ax=plt.axes()
epochs=60
lr=35
for i in range(epochs):
    ax.clear()
    ax.set_xlim(-45, 70)
    ax.set_ylim(-2, 3)
    ax.plot(x, y, c='b')

    #偏微分
    a = df(current_x)
    b = bias(a, current_x)

    #畫導線
    xl=current_x-3
    xr=current_x+3
    yl = a * xl + b
    yr = a * xr + b
    ax.plot([xl, xr], [yl, yr], c='orange')
    ax.scatter(traces, f(traces), c='r')
    ax.scatter(current_x, f(current_x), c='g', s=200)

    current_x -= a * lr
    traces.append(current_x)

    plt.pause(0.01)
plt.show()
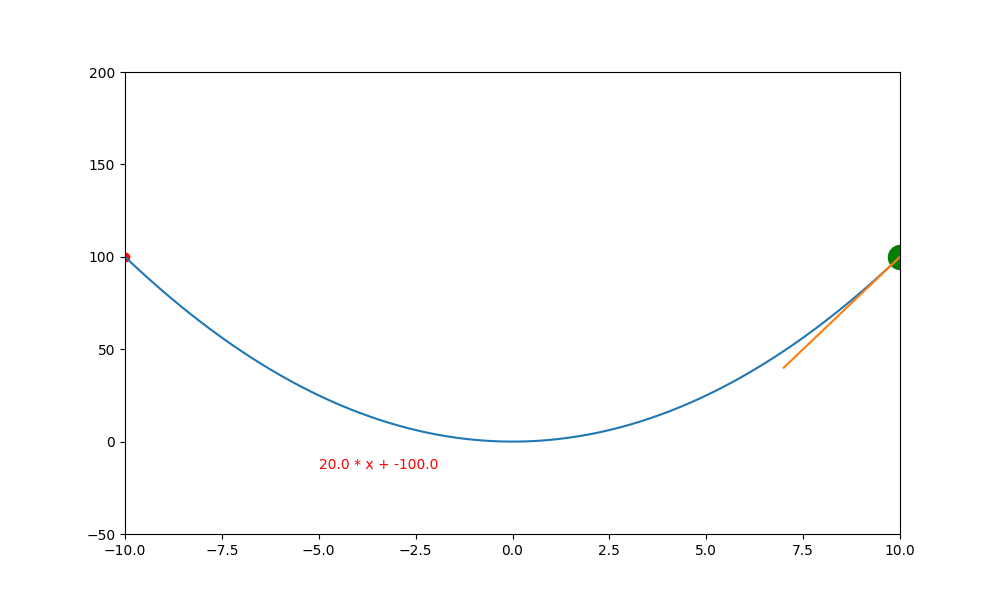
上述就是使用傳統的方式,結果會卡在局部的低值(0,0) 中。
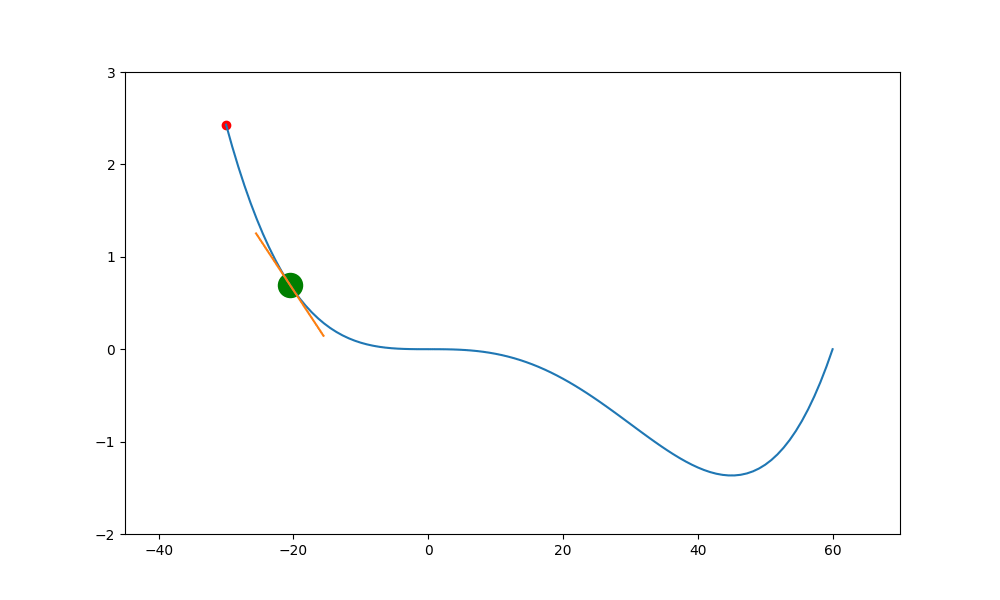
鞍點加動量
加入動量就可能突破鞍點,底下的圖就是加入球的慣性,讓球能越過下一波的高點,但這高點不能高於上一波的高點,否則會因動能不足而跨不過去。
Torch 版
import torch
import pylab as plt
def f(x):
    if not torch.is_tensor(x):
        x=torch.tensor(x)
    #因值很大,所以除以 shrink 縮小 y 值
    return (torch.pow(x,4) - 60 *torch.pow(x,3) - x + 1) * 1e-6
allx = torch.linspace(-30, 60, 100)
ally=f(allx)

fig=plt.figure(figsize=(9,6))
ax=fig.subplots()
epochs=200
lr = 10
m = 1 #質量
v = 0 #速度
u = 0.9 #摩擦力系數
x=torch.tensor([-30.], requires_grad=True)
history=[]
for i in range(epochs):
    y=f(x)
    y.backward() #計算微分,將值存於 x.grad 中
    nx = x.item() #取得 x 的值
    history.append(nx)
    with torch.no_grad():
        a = x.grad.numpy()[0]
        #原始無動量
        #x -= x.grad * lr

        # 計算動量
        v = x.grad * lr + m * v * u
        #計算下一步
        x -= v
        x.grad.zero_()
    b=f(nx) - a * nx
    ax.clear()
    plt.plot(allx, ally, c='b')
    plt.scatter(history, f(history), c='r')
    plt.scatter(nx, f(nx), c='g', s=200)
    ax.set_xlim(-45, 70)
    ax.set_ylim(-2, 3)
    xl = nx - 2
    xr = nx + 2
    plt.plot([xl, xr], [a * xl + b, a * xr + b], c='orange')
    plt.text(-4.0,30,
             f"epoch : {i+1}, x={x.detach().numpy()[0]:.5f}, y={f(x).detach().numpy()[0]:.5f}",
             fontsize=10)
    plt.pause(0.01)
plt.show()
Numpy 版
import numpy as np
import pylab as plt
#y = x^4 - 60x^3 - x + 1
def f(x):
    x=np.array(x)
    #因值很大,所以除以 shrink 縮小 y 值
    y=(np.power(x,4) - 60 * np.power(x,3) - x + 1) / shrink
    return y
def df(x):
    return (4*np.power(x,3) - 180 * np.power(x,2) -1 ) / shrink
def bias(a, x):
    return f(x)- a * x

shrink = 1e6
x=np.linspace(-30,60,100)
y=f(x)
current_x = x[00]
traces=[current_x]
plt.figure(figsize=(9,6))
ax=plt.axes()
epochs=60
lr=35
v = 0
mu = 0.9
for i in range(epochs):
    ax.clear()
    ax.set_xlim(-45,70)
    ax.set_ylim(-2,3)
    ax.plot(x,y, c='b')
    a=df(current_x)
    b=bias(a, current_x)
    xl = current_x - 3
    xr = current_x + 3
    yl = a * xl + b
    yr = a * xr + b
    ax.plot([xl, xr], [yl, yr], c='orange')
    ax.scatter(traces, f(traces), c='r')
    ax.scatter(current_x, f(current_x), c='g', s=200)

    ax.text(-10, -1.5, f'{a:.7f} * x + {b:.7f}', color='red')

    #計算下一點
    v = a * lr + mu * v
    current_x -= v

    traces.append(current_x)
    plt.pause(0.01)
plt.show()
