YOLO V4也可以訓練自已想要辨識的圖片物件,稱為建立模型,簡稱建模。
完成品下載
底下是訓練時所需的圖片及完成的模型,無顯卡的人可下載完成的模型進行測試
套件
系統必需安裝如下套件
pip install Django Pillow tensorflow opencv-python opencv-contrib-python matplotlib numpy

cuda : 11.4 (11.5有問題)
cuDNN : for 11.4
開啟專案
請在yolo4目錄中建立專案
準備圖片
繼 YOLO v4編譯 一篇所述,在Windows10下由 Visual Studio 2019 所編譯出的 “d:\yolo4\darknet-master\build\darknet\x64″,將x64目錄 copy 到 yolo4 專案之下。在x64\data下建立images目錄,然後將要訓練的圖片全丟進此目錄中。請注意,所有圖片都必需是 jpg 的格式。
下載 預訓練權重
請到官方github https://github.com/AlexeyAB/darknet/releases/ 下載 “預訓練權重” yolov4.conv.137 ,並copy 到 d:\yolo4\x64 目錄下
製作cfg檔
.cfg檔就是制定演算法的重要檔案,也包含了其它的設定。請複製 d:\yolo4\x64\cfg\yolov4-custom.cfg,並改名為 yolov4-animal.cfg。然後修改8個地方
1. batch=8 #請依顯卡記憶体大小往下調整
2. subdivision=16
3. width=416
4. height=416
5. max_batches=10000 # 此值為 分類數*2000,但此值若小於6000,則設為6000
6. steps=8000,9000 #此二值為max_batches的 80% 及 90%
7. 三處 [yolo] 內的 classes=5 #此值為分類數
8. 三處[yolo]的前一個 [convolutional]內的 filters=30 #此值為(classes分類數+5)*3=(5+5)*3=30
記錄類別名稱
在x64\data目錄下新增 animal.names檔案。此檔記錄要辨識的類別名稱,請依自已想要訓練的名稱填寫,例如
cat
dog
elephant
pig
tiger
記錄 animal.data
在x64\data目錄下,新增 animal.data檔案。此檔記錄著classes數量,train檔案路徑,valid檔案路徑, names檔,backup位置,如下
classes=5
train=data/animal_train.txt
valid=data/animal_valid.txt
names=data/animal.names
backup=backup/
animal_train.txt及animal_valid.txt是要訓練及驗証的圖片路徑。
animal_train.txt(訓練檔)先空著就好,後面會介紹如何產生。
animal_valid.txt(驗証檔),在本說明中並不考慮, 所以不用理會。
backup目錄則是產生權重的儲存位置。
手動建立backup
yolo4 訓練到一半,有時會出現找不到 backup 目錄的bug,但又時又不會。如果有出現此錯誤, 請在 x64之下手動建立 backup即可。
編輯animal_train.txt
此檔案記錄要逐一訓練的圖片路徑,必需把x64\data\images目錄下所有的圖片格式檔名全部列出,如下所示
ps : yolo4是我們專案的根目錄,而x64則是darknet.exe要開始訓練的根目錄,所以圖片位置必需寫入如下
data/images/1.jpg
data/images/2.jpg
..........
如果圖片很多,用手寫的話會寫到死,所以可以用如下python程式自動產生
import os
files=os.listdir('d:/yolo4/x64/data/images')
file_list=open('d:/yolo4/x64/data/animal_train.txt', 'w')
for file in files:
    if file.endswith(".jpg"):
        path=f'data/images/{file}\n'
        file_list.write(path)
file_list.close()
標識圖片標籤
使用labelImg標識圖片要辨識的物件座標,請安裝系統級 pip install labelimg,然後於dos下執行 labelimg即可。請注意標識圖片時,要由 PascalVOC改成 YOLO格式,YOUO格式為 .txt檔。
如果以前曾使用PascalVOC格式標識過圖片,可以使用如下 python 將 VOC轉成YOLO格式。
請先將 VOC格式的xml目錄copy 到 x64/data之下,再執行如下程式。
voc_to_yolo.py
#請先 pip install BeautifulSoup4 lxml
import os
from bs4 import BeautifulSoup
def run_convert(all_classes, voc_path, yolo_path):
    for file in os.listdir(voc_path):
        try:
            print(f"{file} is readding")
            with open(os.path.join(voc_path, file), 'r') as f:
                soup = BeautifulSoup(f.read(), 'xml')

                for size in soup.select('size'):
                    img_w = int(size.select_one('width').text)
                    img_h = int(size.select_one('height').text)

                img_info = []
                for obj in soup.select('object'):
                    xmin = int(obj.select_one('xmin').text)
                    xmax = int(obj.select_one('xmax').text)
                    ymin = int(obj.select_one('ymin').text)
                    ymax = int(obj.select_one('ymax').text)
                    objclass = all_classes.get(obj.select_one('name').text)

                    x = (xmin + (xmax - xmin) / 2) * 1.0 / img_w
                    y = (ymin + (ymax - ymin) / 2) * 1.0 / img_h
                    w = (xmax - xmin) * 1.0 / img_w
                    h = (ymax - ymin) * 1.0 / img_h
                    img_info.append(' '.join([str(objclass), str(x), str(y), str(w), str(h)]))

                # create yolo bndbox txt
                with open(yolo_path+ '/'+ file.split('.')[0] + '.txt', 'a+') as f:
                    f.write('\n'.join(img_info))
            print(f'{file} was processed')
        except Exception as e:
            print(e)
all_classes = {'crack': 0, 'manhole': 1, 'pothole': 2}
voc_path = "d:/yolo4/models/data/xml"
yolo_path = "d:/yolo4/models/data/images"
run_convert(all_classes, voc_path, yolo_path)
訓練模型
上述都準備好了,就可以在DOS模式下執行如下指令開始訓練模型。請注意,在開始訓練前,要把挖礦的nbminer程式先關掉喔,不然會當機。
darknet.exe detector train data\animal.data cfg\yolov4-animal.cfg yolov4.conv.137
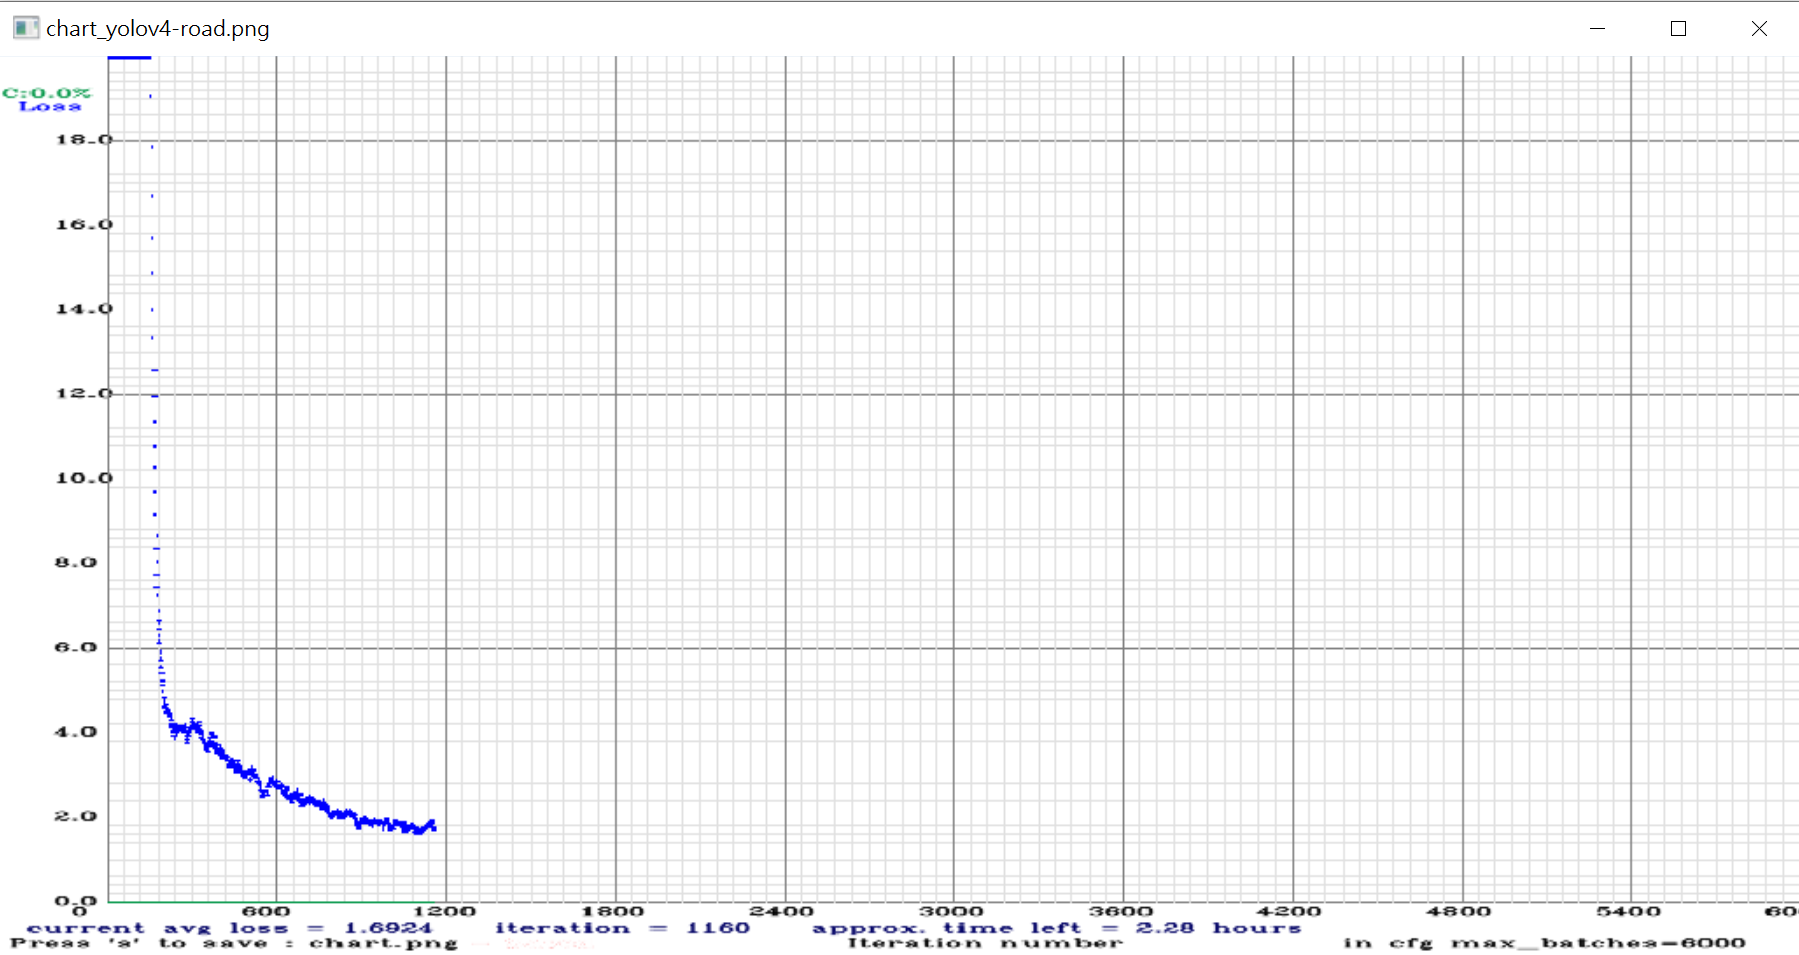
此時會經歷一段很長的時間,時間長短端看你的電腦等級及訓練圖片的數量。本人以RTX3080TI 12G Ram訓練20張圖, 大約要花上6小時。如果使用 Geforce 1050Ti 4G Ram, 可能要4天(96小時)。
訓練好的模型權重,會自動置於 d:\yolo4\x64\backup目錄之下,檔名為 yolov4-animal_final.weights。此檔為後續要偵測的重要檔案。
在開始訓練約幾秒鐘後,就會彈出損失率報表,如下圖所示
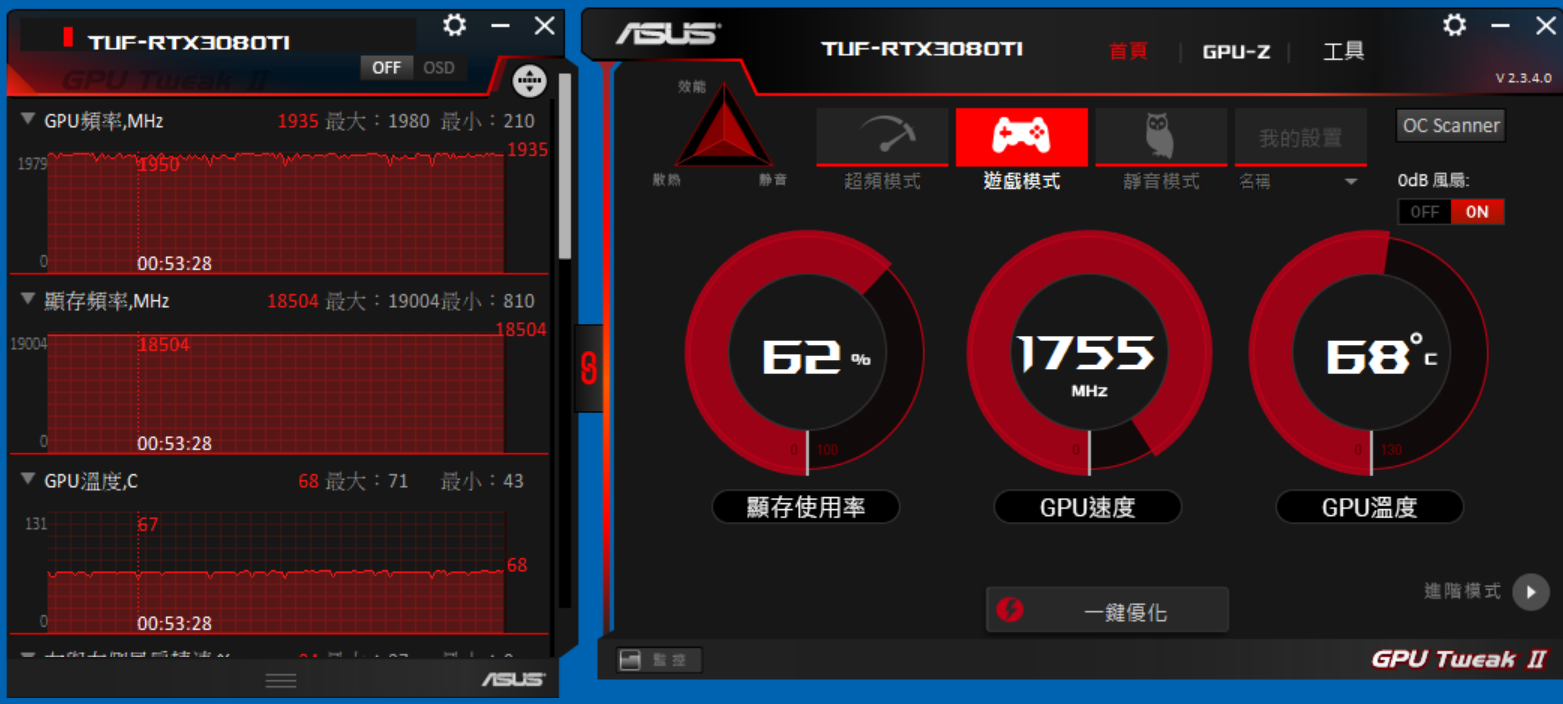
訓練過程中,顯卡的溫度會達到70多度,雖說這是正常的溫度,不過本人還是打開電腦外殼,用電風扇直吹主機,才把溫度降到60多度。這主機在寒冬時建模,是不用開暖氣的。
建模錯誤
建模時,若發生cublasLt64_11.dll 找不到,請 copy C:\Program Files\NVIDIA GPU Computing Toolkit\CUDA\v11.2\bin\cublasLt64_10.dll,並改為 cublasLt64_11.dll。
偵測新圖片
開新專案
在Python偵測新圖片時,會由darknet.py檔載入 vs2009 編譯好的C++函數庫,完全不需使用tensorflow套件,所以開啟新專案後只需 pip install Pillow, opencv-python。
1. copy animal.data, animal.names, yolov4-animal.cfg 到專案下data目錄
2. copy 上述backup下的 yolov4-animal_final.weights 到 python 專案之下data目錄
3. copy d:\yolo4\x64\darknet.py 到專案下
4. copy d:\yolo4\x64下的 pthreadGC2.dll, pthreadVC2.dll 到專案之下
編譯yolo_cpp_dll.dll
使用 vs2019 開啟 D:\yolo4\darknet-master\build\darknet\yolo_cpp_dll.sln,並設定為 release及 x64,再執行建置/建置方案。此時在 D:\yolo4\darknet-master\build\darknet\x64之下就會產生 yolo_cpp_dll.dll,將此檔案copy到python專案之下。
編譯yolo_cpp_dll_no_gpu
如果沒有顯卡,就要使用vs2019開啟 darknet-master\build\darknet\yolo_cpp_dll_no_gpu.sln。不過此專案編譯時會報錯LNK2001 無法解析的外部符號 make_implicit_layer,需先修改yolo_cpp_dll_no_gpu.vcxproj
第162行加入如下藍色的部份
<ClCompile Include="..\..\src\activations.c" />
<ClCompile Include="..\..\src\representation_layer.c" />
<ClCompile Include="..\..\src\activation_layer.c" />

第237行加入如下藍色的部份
<ClInclude Include="..\..\include\darknet.h" />
<ClInclude Include="..\..\src\representation_layer.h" />
<ClInclude Include="..\..\include\yolo_v2_class.hpp" />
修改儲存後,回 vs2019,選擇全部重新載入,就可以編譯成功了。編譯完的檔名一樣是yolo_cpp_dll.dll
偵測代碼
偵測新圖片的完整代碼如下。請注意,開始偵測前,一定要把圖片轉成RGB格式,才能正確偵測到。
#!/usr/bin/env python
import pylab as plt
import cv2
import numpy as np
from PIL import ImageFont, Image
import darknet
def image_detection(image, model, class_names, colors, thresh):
yolo_width = darknet.network_width(model)#416
yolo_height = darknet.network_height(model)#416
img_thumb = cv2.resize(image.copy(), (yolo_width, yolo_height), interpolation=cv2.INTER_LINEAR)
native_height, native_width =image.shape[:2]
#Yolo有自已的IMAGE格式,此格式不是numpy,也不是Pillow的Image
yolo_img = darknet.make_image(yolo_width, yolo_height, 3)#空白圖片
darknet.copy_image_from_bytes(yolo_img, img_thumb.tobytes())
detections = darknet.detect_image(model, class_names, yolo_img, thresh=thresh)#開始偵測
#變更detections裏的座標及長寬
x_rate=native_width/yolo_width
y_rate=native_height/yolo_height
new_detections=[]
for d in detections:
#d[0] : 總類
#d[1] : 分數
#d[2] : box 變形後的座標
s=(d[0], d[1], (d[2][0]*x_rate, d[2][1]*y_rate, d[2][2]*x_rate, d[2][3]*y_rate))
new_detections.append(s)
darknet.free_image(yolo_img)
return new_detections
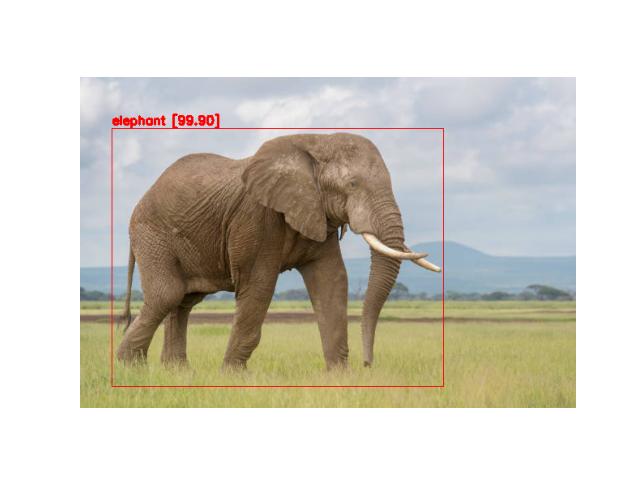
img_path='images/elephant_4.jpg'
config_file = 'data/yolov4-animal.cfg'
data_file = 'data/animal.data'
weights = 'data/yolov4-animal_final.weights'
batch_size = 1
thresh = .25
#自訂顏色
colors={
'cat': (0, 255, 255),
'dog': (0, 255, 0),
'elephant': (255,0,0),
'pig': (255,255,0),
'tiger': (0,0,255)
}
font = ImageFont.truetype('simsun.ttc', 30)
#載入模型
model, class_names, random_colors=darknet.load_network(
config_file,
data_file,
weights,
batch_size=batch_size
)
image=cv2.imdecode(np.fromfile(img_path, dtype=np.uint8), cv2.IMREAD_UNCHANGED)
#開始偵測前,需將圖片轉成RGB格式
image=cv2.cvtColor(image, cv2.COLOR_BGR2RGB)
detections= image_detection(image, model, class_names, colors, thresh)
for d in detections:
print(d[0], d[1], d[2])
image_box = darknet.draw_boxes(detections, image, colors) # 畫框線及標識物件名稱
ax=plt.subplot()
ax.imshow(image_box)
ax.axis("off")
plt.savefig("elephant_ok.jpg")
plt.show()