網路上有另一種辨識17種花卉的討論,請先安裝如下套件
pip install tensorflow matplotlib opencv-python
收集圖片
圖片資料集請下載 flowers_17.zip,然後解開後置於專案之下。
label.txt
flowers圖片共有17種,每種 80 張圖片,所以共有1360張圖片,1~80是水仙(Narcissus),81~160是雪花蓮(Snowdrop),請先於專案下新增 label.txt,然後輸入如下資料。
1       80      Narcissus
81      160     Snowdrop
161     240     LilyValley
241     320     Bluebell
321     400     Crocus
401     480     Iris
481     560     Tigerlily
561     640     Daffodil
641     720     Fritillary
721     800     Sunflower
801     880     Daisy
881     960     ColtsFoot
961     1040    Dandelion
1041    1120    Cowslip
1121    1200    Buttercup
1201    1280    Windflower
1281    1360    Pansy
分類訓練圖片及驗証圖片
將所有的圖片分類成 train_images及 test_images二個目錄,每個目錄又有17種花卉目錄。
新增 “分割資料.py” 檔,程式碼如下。
請注意, Linux 下使用 os.listdir() 並不會依檔案字母順序列出,所以在檔案存取時的順度要特別注意。
#!./.venv/bin/python3
import os
os.environ['TF_CPP_MIN_LOG_LEVEL'] = '2'
import random
import shutil

in_path="flowers_17"
train_path='train_images'
test_path='test_images'
if os.path.exists(train_path):
    shutil.rmtree(train_path)
if os.path.exists(test_path):
    shutil.rmtree(test_path)
os.mkdir(train_path)
os.mkdir(test_path)

files=[] #[[檔名, 花名],.....]
flowers=[] #17種花名
with open('label.txt')as file:
    for line in file:
        cols=line.strip().split()
        s=int(cols[0])
        e=int(cols[1])
        flower=cols[2]
        flowers.append(flower)
        for i in range (s, e+1):
            files.append([f'image_{i:04d}.jpg', flower])

for flower in flowers:
    os.mkdir(os.path.join(train_path, flower))
    os.mkdir(os.path.join(test_path, flower))

random.seed(1)
random.shuffle(files)

mid=int(len(files)*0.9)

for file, dir in files[:mid]:
    source = os.path.join(in_path, file)
    target = os.path.join(train_path, dir, file)
    print(f'copy {source}  => {target}')
    shutil.copy(source, target)

for file, dir in files[mid:]:
    source = os.path.join(in_path, file)
    target = os.path.join(test_path, dir, file)
    print(f'copy {source}  => {target}')
    shutil.copy(source, target)
訓練模型
建立模型跟前一篇的 5 種花卉雷同。
#!./.venv/bin/python3
import os
import cv2
from keras.src.applications.vgg19 import VGG19, preprocess_input
from keras.src.layers import GlobalAveragePooling2D, Dense, BatchNormalization, Dropout, Flatten
from keras.src.optimizers import Adam, RMSprop

from MahalSdk.cv import cv
from keras import Sequential
import pylab as plt

os.environ['TF_CPP_MIN_LOG_LEVEL'] = '2'
import numpy as np
with open('label.txt','r')as file:
    flowers=[line.strip().split()[2] for line in file]

train_imgs=[]
train_labels=[]
test_imgs=[]
test_labels=[]
train_path="train_images"
test_path="test_images"

#製作訓練資料及測試資料
for flower in flowers:
    for file in os.listdir(os.path.join(train_path, flower)):
        img=cv.read(os.path.join(train_path, flower, file))[:,:,::-1].copy()
        img=cv2.resize(img, (224, 224), interpolation=cv2.INTER_LINEAR)
        train_imgs.append(img)
        train_labels.append(flower)
    for file in os.listdir(os.path.join(test_path, flower)):
        img = cv.read(os.path.join(test_path, flower, file))[:, :, ::-1].copy()
        img=cv2.resize(img, (224,224), interpolation=cv2.INTER_LINEAR)
        test_imgs.append(img)
        test_labels.append(flower)
train_imgs = np.array(train_imgs)
test_imgs = np.array(test_imgs)

#one hot
train_onehot=np.zeros([len(train_labels),17])
test_onehot=np.zeros([len(test_labels),17])
for i in range(len(train_onehot)):
    train_onehot[i][flowers.index(train_labels[i])] = 1
for i in range(len(test_onehot)):
    test_onehot[i][flowers.index(test_labels[i])] = 1

#建模
model_base=VGG19(weights='imagenet', include_top=False, input_shape=(224,224,3))
for layer in model_base.layers:
    layer.trainable=False
model=Sequential()
model.add(model_base)
model.add(GlobalAveragePooling2D())
model.add(Dense(256,activation='relu'))
model.add(BatchNormalization())
model.add(Dense(64,activation='relu'))
model.add(BatchNormalization())
model.add(Dropout(0.2))
model.add(Dense(17, activation='softmax'))

model.compile(
    optimizer=Adam(learning_rate=0.001),
    #optimizer=RMSprop(learning_rate=2e-4),
    loss='categorical_crossentropy',
    metrics=['accuracy']
)
#訓練
history=model.fit(
    train_imgs,
    train_onehot,
    batch_size=128,
    epochs=50,
    validation_data=(test_imgs, test_onehot)
)
model.save("model_flower_17.keras")
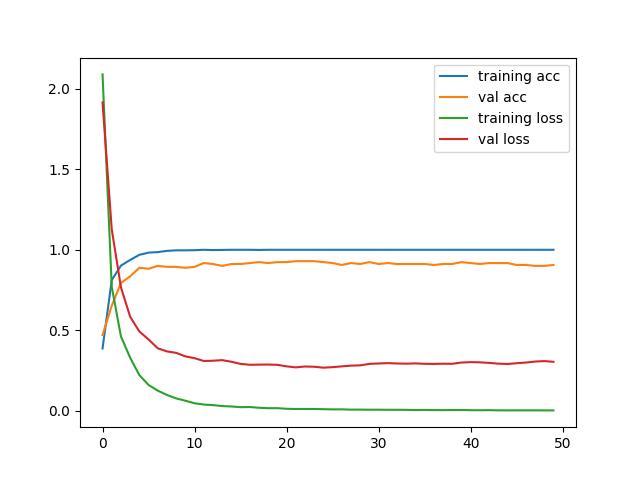
p1=plt.plot(history.history['accuracy'], label='training acc')
p2=plt.plot(history.history['val_accuracy'], label='val acc')
p3=plt.plot(history.history['loss'], label='training loss')
p4=plt.plot(history.history['val_loss'], label='val loss')
plt.legend()
plt.show()

辨識圖片
上述模型若是無法訓練的話,請由如下網址下載本人已訓練好的模型
下載模型 : model_flower_17.zip
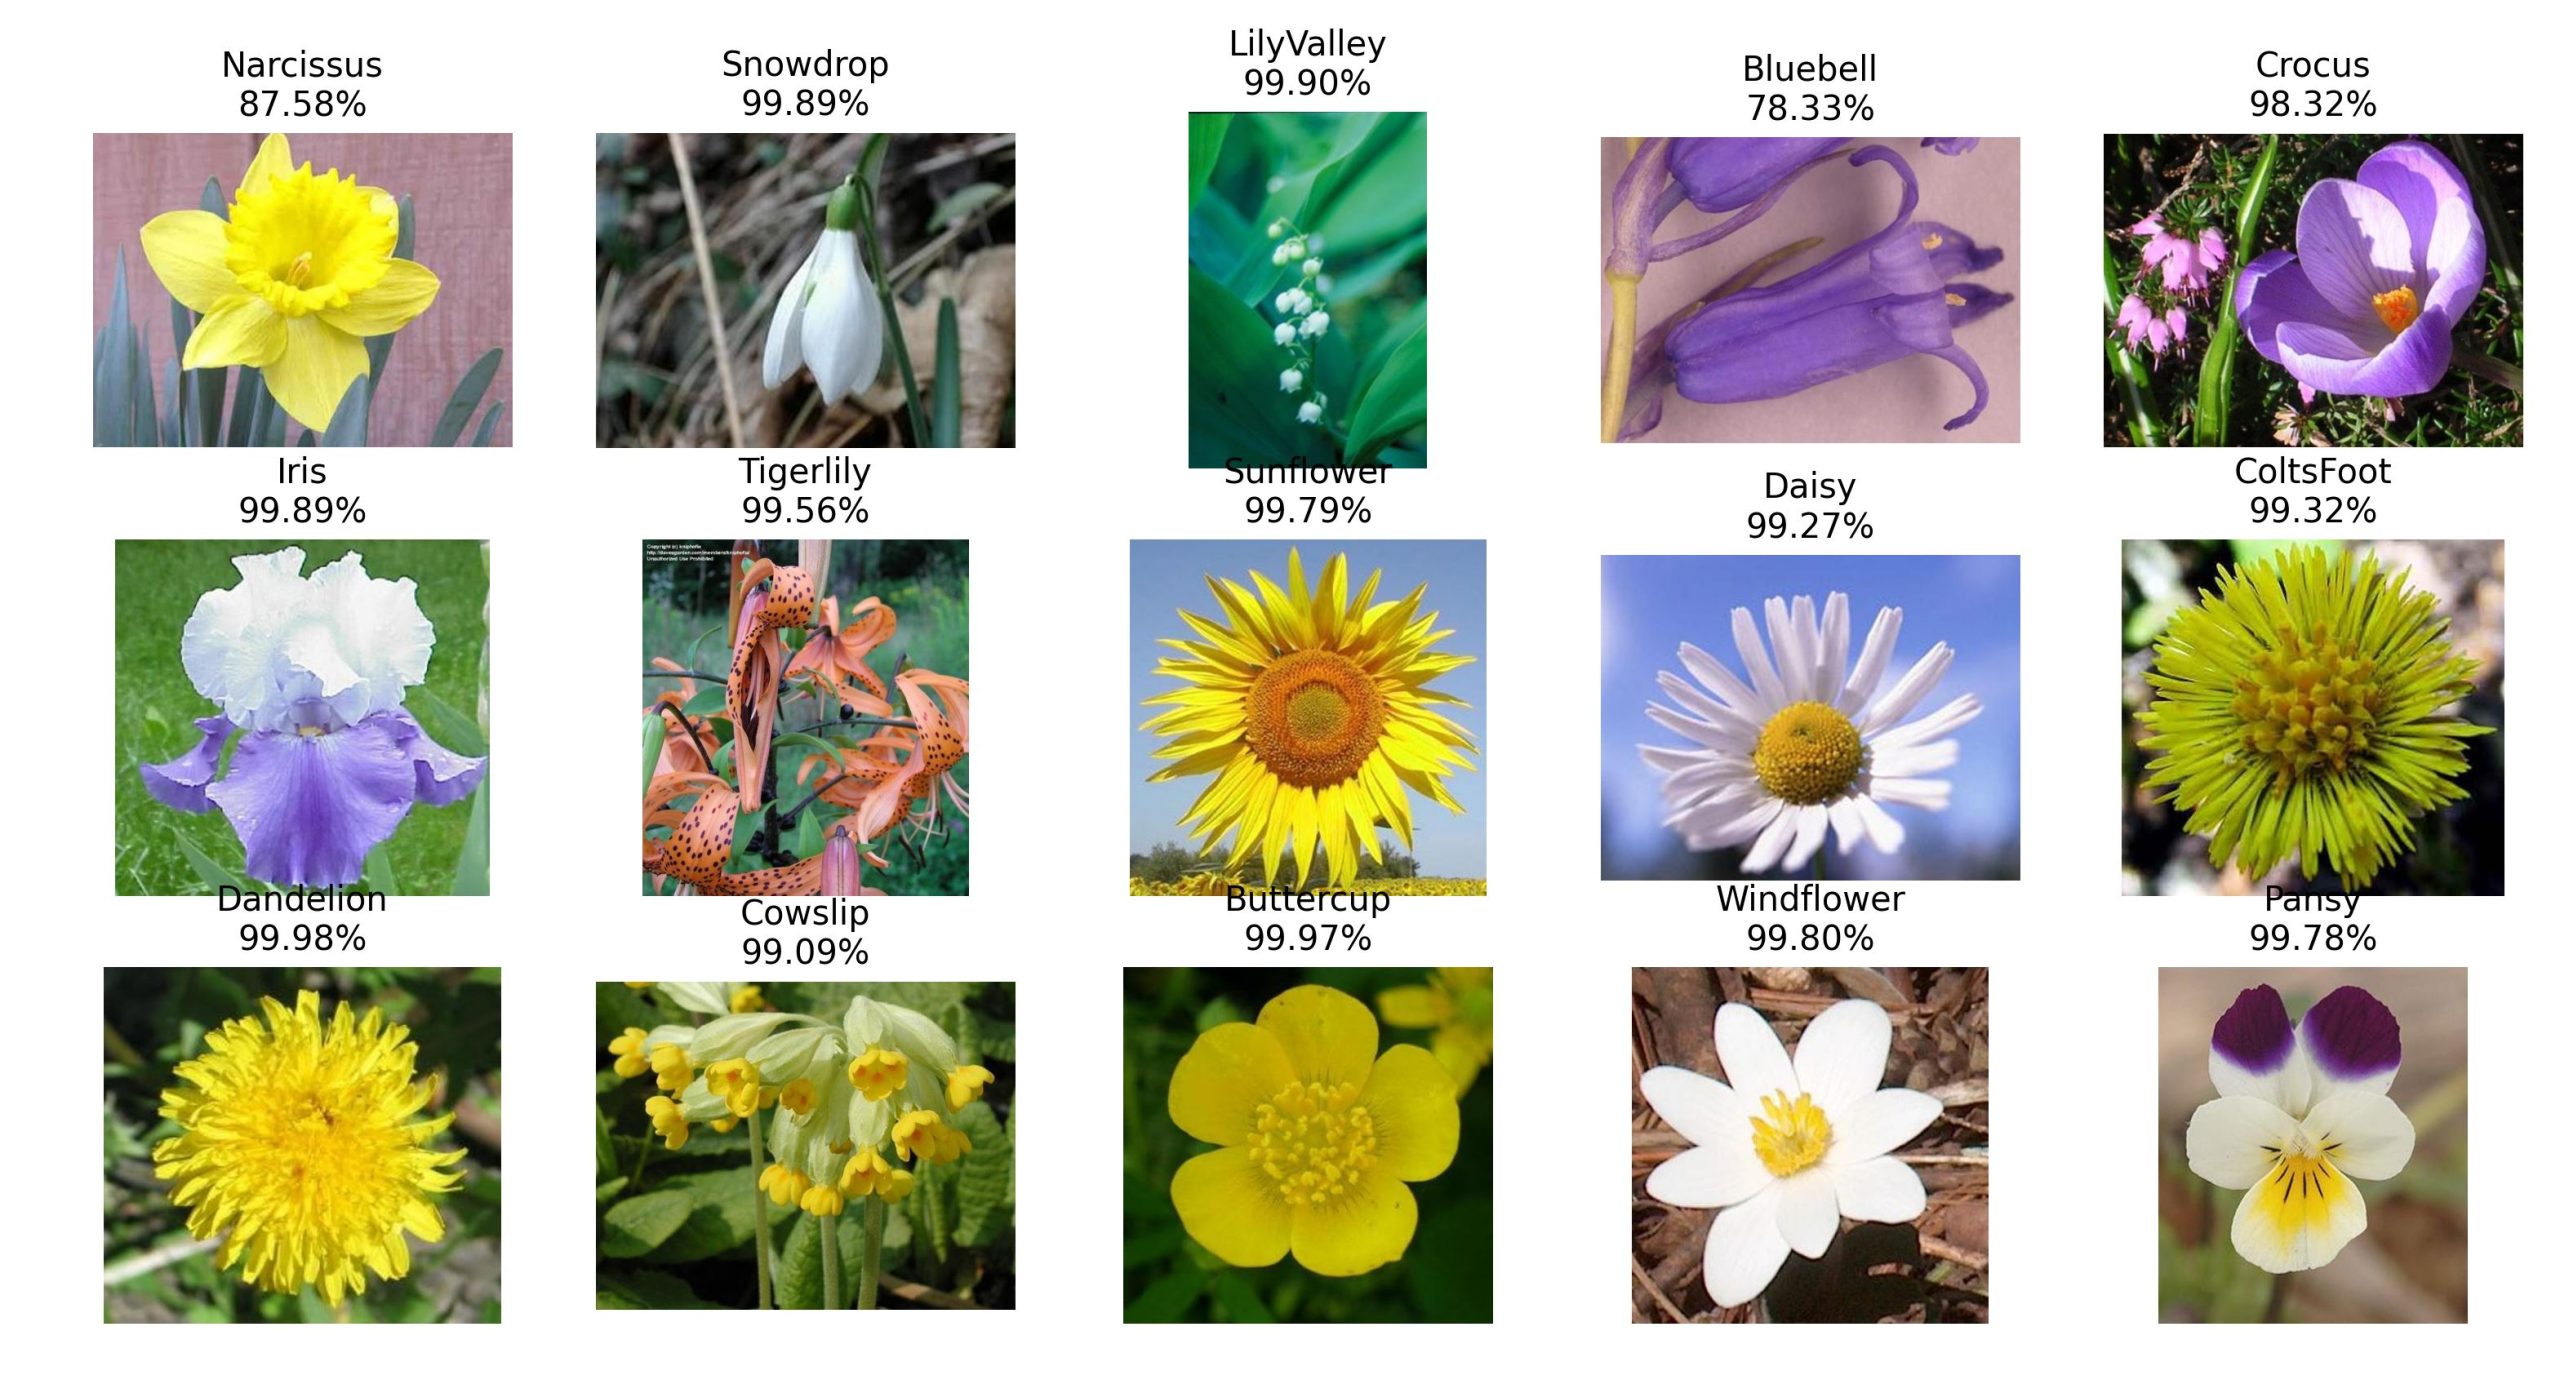
將要辨識的圖片放在 ./images裏面,然後開始辨識。
import keras
from keras.src.applications.convnext import preprocess_input

from MahalSdk.cv import cv
import cv2
import numpy as np
import pylab as plt
import os
os.environ['TF_CPP_MIN_LOG_LEVEL'] = '2'
model=keras.models.load_model("./model_flower_17.keras")
path="./images"
with open('label.txt')as file:
    flowers=[
        line.strip().split()[2] for line in file
    ]

for i, file in enumerate(os.listdir(path)):
    img = cv.read(os.path.join(path, file))[:,:,::-1].copy()
    x = cv2.resize(img, (224, 224), interpolation=cv2.INTER_LINEAR)
    x = np.expand_dims(x, axis=0)
    x = preprocess_input(x)
    out = model.predict(x)
    idx=out[0].argmax()
    name=flowers[idx]
    score=out[0][idx]
    ax=plt.subplot(3, 5, i+1)
    ax.set_title(f"{name}\n{score*100:.2f}%")
    ax.imshow(img)
    ax.axis("off")
plt.show()

list 相加與 np.r_ 效能
上述代碼中,原本是使用 np.r_ 建立陣列,但這種方式的效能極差,所以改用 list += 來加速。由如下程式碼可知,list 相加的效能確實高出許多
import numpy as np
import time
a=[]
t1=time.time()
for i in range(1000):
    a+=["hello"]*1000
a=np.array(a)
t2=time.time()
print(a)
print(f'list相加 : {t2-t1}秒')

a=np.empty(0,dtype=object)
t1=time.time()
for i in range(1000):
    a=np.r_[a, ["hello"]*1000]
t2=time.time()
print(a)
print(f'np.r_ : {t2-t1}秒')

結果:
['hello' 'hello' 'hello' ... 'hello' 'hello' 'hello']
list相加 : 0.10912036895751953秒
['hello' 'hello' 'hello' ... 'hello' 'hello' 'hello']
np.r_ : 4.773515701293945秒
