
Nginx (讀作 engine x)是一個免費的開源軟體, 一個非同步框架的 web server. 不過它的功用不僅為 web server, 更多的用途是作為反向代理、Http Cache、負載平衡器. 近幾年十分火熱, 使用率有超越 Apache 的趨勢.
這一二年來, 本人發現 Apache在同時約60人的連線中, 有時就會爛爛的, 甚至crash. 激起了本人把Apache換掉的念頭. 底下是Nginx的優勢, 也是換掉Apache的原因
另一個會換掉Apache的原因, 是因為Nginx可以作直播系統伺服器
面向效能
Nginx 在處理 IO 並發與靜態文檔方面效能比 Apache 強很多, 這跟 web server 的底層設計有關. 因此在需要應對大流量的狀況下,許多公司會選擇使用 Nginx 作為 server 而不是 Apache。
記憶體消耗低
一樣拿 Apache 來比較,Nginx 佔用了相對低的資源與內存,另外值得注意的是 Nginx 在高併發狀況下可以保持低資源低消耗,卻仍能保有高效能。
反向代理&負載平衡
這點Apache 也做得到, 但效能差. Nginx 可以消耗更少的資源處理更多的連線請求。
將Apache轉換成Nginx, 幾乎是無痛的, 把/etc/apache2/ports.conf 及 /etc/apache2/siet-available/000-default.conf裏的80 port空出來. 然後照下面的方式操作, 就可以把網站全部改過來. 用來運作wordpress順的不得了
nginx安裝及設定
安裝nginx
在ubuntu20.04安裝nginx很簡單, 只要下達如下指令即可
sudo apt-get install nginx libnginx-mod-rtmp
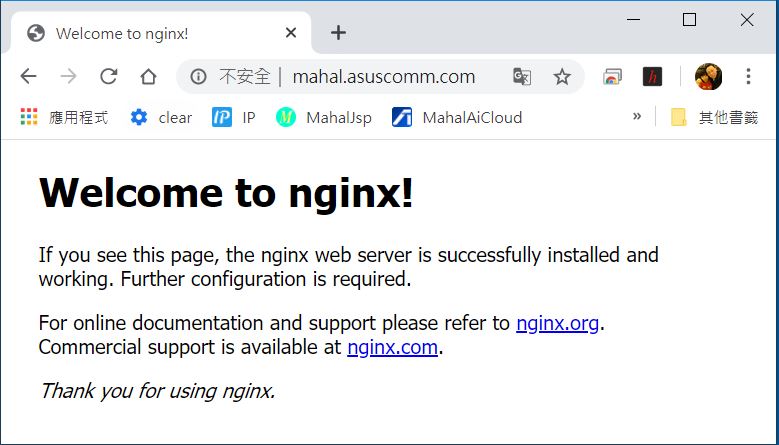
此時在瀏覽器網址輸入 http://localhost即可看到如下畫面
啟動停止
sudo systemctl stop nginx
sudo syatemctl start nginx
sudo systemctl restart nginx
sudo systemctl reload nginx
nginx.conf 設定
開啟 /etc/nginx/nginx.conf,更改新增如下藍色設定
events {
        use epoll;
        worker_connections 1024;
        # multi_accept on;
}
http{
    #手動加入此段, 防止資料太大無法上傳
    client_max_body_size 4096m;
    proxy_connect_timeout   100;
    proxy_send_timeout      150;
    proxy_read_timeout      200;
}
php安裝及設定
安裝 php
Nginx 支援 php FPM (FastCGI Process Manager),請安裝如下套件。
請注意 FPM 是 Non Thrad Safe,使用多行程管理,速度快且穩定。
sudo apt-get install nginx-extras php-fpm php-mysqlnd php-mysqli php-gd php-curl php-dom php-imagick php-mbstring php-zip php-intl
設定
sudo vim /etc/php/8.1/fpm/pool.d/www.conf, 在www.conf更改如下設定
listen = 127.0.0.1:9000
;php_admin_value[memory_limit] = 32M
php_admin_value[memory_limit] = 8192M
sudo vim /etc/php/8.1/fpm/php.ini, 修改如下四個。
尤其是 memory_limit,如果使用預設的 128M,會讓 wordpress 無法正確顯示網頁。因為選單很多的話,128M 是不夠的。本站就佔用到快 300M 的記憶体容量。
max_execution_time = 300
memory_limit = 4096M
post_max_size = 1000M
upload_max_filesize = 1000M
設定虛擬伺服器
先執行如下指令建立 web 目錄
sudo mkdir /data/video/web
sudo chown www-data:www-data /data/video/web
然後使用 sudo vim /etc/nginx/sites-available/default,將 server 區塊改成如下
server{
        listen 80;
        listen [::]:80;
        server_name ~.*;
        root /data/server/web;
        add_header X-Frame-Options SAMEORIGIN;#禁止網頁被內崁
        index index.php index.html;
        location ~* \.(ico|css|js|gif|jpe?g|png|ogg|ogv|svg|svgz|eot|otf|woff)(\?.+)?$ {
                expires max;
                log_not_found off;
        }
        location / {
                try_files $uri $uri/ /index.php?$args;
        }
        location ~* \.php$ {
                fastcgi_pass 127.0.0.1:9000;
                fastcgi_index index.php;
                fastcgi_split_path_info ^(.+\.php)(.*)$;
                include fastcgi_params;
                fastcgi_param SCRIPT_FILENAME $document_root$fastcgi_script_name;
        }
        location /nginx_status { #此為監控 nginx 用的
                stub_status;
                allow 0.0.0.0;
        }
}
請注意上面紅色的部份,”?$args” 是為了防止 wordpress 5.0版開始在新增文章時,會出現 Cannot read properties of undefined (reading ‘show_ui’) 這種莫名奇妙的錯誤。
server_name 與浮動 ip
server_name 後面可以加多個網域或ip,如下
server_name localost mahaljsp.asuscomm.com 192.168.1.5 220.18.92.63;
但如是要使用浮動ip進行連線呢?? 先說明為什麼非要用 ip連線 : 因為本人使用 asus的 ip分享器進行轉址,但華碩動不動就掛掉,所以緊急時就只能用 ip 連線。
而浮動ip隨時都會變,所以將浮動 ip 寫在 server_name後面,其實沒啥意義。所以必需想個方法,讓所有的 ip 都轉到我們的虛擬伺服器上,此方法如下
server_name ~.*;
重新啟動
最後重新啟動 php-pfm 及 nginx
sudo service php8.1-fpm restart
sudo service nginx restart
測試
因為網頁根目錄設定在 /data/video/web, 所以在此目錄下新增 info.php
<?php
    phpinfo();
?>
記得更改檔案擁有者
sudo chown www-data:www-data /data/server/web/info.php
然後於瀏覽器輸入 http://localhost/info.php即可看到 php 的資訊。
查看 php 連線數
可以使用如下指令查詢有多少條 php-fpm 連線
top -p $(pgrep -d ',' php-fpm)
Nginx SSL
Nginx 預設 80 port,網址開頭為 http:// ,這些資料使用明碼在網路上到處流竄,很容易被駭客攔截盜用,且現今的 Chrome 或是 Edge 都會在前面加上不安全的字樣,這會讓一般使用者誤以為是個危險的網站。
![]()
為了讓瀏覽器不再出現不安全的字樣,並防止駭客攔截資料,就必需使用 SSL 將資料加密,經過加密後的網址開頭會改成 https:// 。
SSL 全名為 Secure Sockets Layer,由 Netscape 在1994 年推出。伺服器與客戶端之間的通訊,皆經過加密才傳遞,所以就算訊息被攔截,攔截者也只會看到一堆亂碼而以,完全無法解碼。
本篇只適用在 Linux 下簽署 SSL,若要在 Windows 下簽署,請參考 Let’s Encrypt 官網說明。
先搞定 80 port
想要讓網站從 http:// 改成 https://,還是需先把 80 port 搞定。以本站為例,共設了四個網域,一個是 8900 port,另外三個是 80 port
server{
	listen 8900;
	listen [::]:8900;
	server_name ~.*;
	root /server/thomas;
	index index.php index.html;
	add_header X-Frame-Options SAMEORIGIN;
	location ~* \.(ico|css|js|gif|jpe?g|png|ogg|ogv|svg|svgz|eot|otf|woff)(\?.+)?$ {
		expires max;
		log_not_found off;
	}
	location / {
		try_files $uri $uri/ /index.php?$args;
	}
	location ~* \.php$ {
		fastcgi_pass 127.0.0.1:9000;
		fastcgi_index index.php;
		fastcgi_split_path_info ^(.+\.php)(.*)$;
		include fastcgi_params;
		fastcgi_param SCRIPT_FILENAME $document_root$fastcgi_script_name;
	}
}
server{
	listen 80;
	listen [::]:80;
	server_name mahaljsp.asuscomm.com;
	root /server/wordpress;
	index index.php index.html;
	add_header X-Frame-Options SAMEORIGIN;
	location ~* \.(ico|css|js|gif|jpe?g|png|ogg|ogv|svg|svgz|eot|otf|woff)(\?.+)?$ {
		expires max;
		log_not_found off;
	}
	location / {
		try_files $uri $uri/ /index.php?$args;
	}
	location ~* \.php$ {
		fastcgi_pass 127.0.0.1:9000;
		fastcgi_index index.php;
		fastcgi_split_path_info ^(.+\.php)(.*)$;
		include fastcgi_params;
		fastcgi_param SCRIPT_FILENAME $document_root$fastcgi_script_name;
	}
}

server{
	listen 80;
	listen [::]:80;
	server_name mahaljsp.ddns.net;
	root /server/wordpress;
	index index.php index.html;
	add_header X-Frame-Options SAMEORIGIN;
	location ~* \.(ico|css|js|gif|jpe?g|png|ogg|ogv|svg|svgz|eot|otf|woff)(\?.+)?$ {
		expires max;
		log_not_found off;
	}
	location / {
		try_files $uri $uri/ /index.php?$args;
	}
	location ~* \.php$ {
		fastcgi_pass 127.0.0.1:9000;
		fastcgi_index index.php;
		fastcgi_split_path_info ^(.+\.php)(.*)$;
		include fastcgi_params;
		fastcgi_param SCRIPT_FILENAME $document_root$fastcgi_script_name;
	}
	location /thomas {
		proxy_pass http://localhost:7002;
		proxy_set_header Host $http_host;#將客戶端的 HOST 傳入 Django
		proxy_set_header X-Forwarded-For $proxy_add_x_forwarded_for;
	}
	location /files {
		alias /data/server/wp_download;
	}
}

server {
	listen 80;
	listen [::]:80;
	server_name  mahalpyweb.ddns.net;
	location / {
	proxy_pass http://localhost:7001;
		proxy_set_header Host $http_host;#將客戶端的 HOST 傳入 Django
		proxy_set_header X-Forwarded-For $proxy_add_x_forwarded_for;#將客戶 ip 傳入Django
	}
}
設定好要重啟 nginx,如果重啟失敗就要修改上面的設定,直到重啟成功才能繼續往下操作。
sudo nginx restart nginx
安裝 Let’s Encrypt certbot
接下來要取得第三方的 SSL 加密認証,大部份的第三方認証都需要付費,實在會讓人傾家盪產,還好有 Let’s Encrypt 可以免費使用,不過每三個月就要更新一次認証。請使用如下指令安裝 certbot 程式
sudo apt install -y certbot python3-certbot-nginx
第一次執行 certbot
使用如下指令執行 certbot
sudo certbot --nginx
第一次執行時,會要求輸入 eMail 及同意相關規定,並選擇要設定憑証的網站,如下
Saving debug log to /var/log/letsencrypt/letsencrypt.log
Enter email address (used for urgent renewal and security notices)
 (Enter 'c' to cancel): mahaljsp@gmail.com

- - - - - - - - - - - - - - - - - - - - - - - - - - - - - - - - - - - - - - - -
Please read the Terms of Service at
https://letsencrypt.org/documents/LE-SA-v1.3-September-21-2022.pdf. You must
agree in order to register with the ACME server. Do you agree?
- - - - - - - - - - - - - - - - - - - - - - - - - - - - - - - - - - - - - - - -
(Y)es/(N)o: Y

- - - - - - - - - - - - - - - - - - - - - - - - - - - - - - - - - - - - - - - -
Would you be willing, once your first certificate is successfully issued, to
share your email address with the Electronic Frontier Foundation, a founding
partner of the Let's Encrypt project and the non-profit organization that
develops Certbot? We'd like to send you email about our work encrypting the web,
EFF news, campaigns, and ways to support digital freedom.
- - - - - - - - - - - - - - - - - - - - - - - - - - - - - - - - - - - - - - - -
(Y)es/(N)o: Y
Account registered.

Which names would you like to activate HTTPS for?
We recommend selecting either all domains, or all domains in a VirtualHost/server block.
- - - - - - - - - - - - - - - - - - - - - - - - - - - - - - - - - - - - - - - -
1: mahaljsp.ddns.net
2: mahaljsp.asuscomm.com
3: mahalpyweb.ddns.net
- - - - - - - - - - - - - - - - - - - - - - - - - - - - - - - - - - - - - - - -
Select the appropriate numbers separated by commas and/or spaces, or leave input
blank to select all options shown (Enter 'c' to cancel): 1 2 3
Requesting a certificate for mahaljsp.ddns.net
執行完 certbot 將憑証放在 /etc/letsencrypt/live/xxx.ddns.net 目錄下。憑証有二個,分別為 fullchain.pem及privkey.pem。
執行上面指令會自動更改 Nginx 設定檔,而且會自動重啟 nginx。
更改後的 nginx
certbot 執行後會自動增加 nginx 設定檔如下藍色的地方。
server{
	listen 8900;
	listen [::]:8900;
	server_name ~.*;
	root /server/thomas;
	index index.php index.html;
	#不是 80 port 的設定,完全不變
}
server{
	server_name mahaljsp.asuscomm.com;
	root /server/wordpress;
	index index.php index.html;
	add_header X-Frame-Options SAMEORIGIN;
	location ~* \.(ico|css|js|gif|jpe?g|png|ogg|ogv|svg|svgz|eot|otf|woff)(\?.+)?$ {
		expires max;
		log_not_found off;
	}
	.......

    listen [::]:443 ssl ipv6only=on; # managed by Certbot
    listen 443 ssl; # managed by Certbot
    ssl_certificate /etc/letsencrypt/live/mahaljsp.asuscomm.com/fullchain.pem; # managed by Certbot
    ssl_certificate_key /etc/letsencrypt/live/mahaljsp.asuscomm.com/privkey.pem; # managed by Certbot
    include /etc/letsencrypt/options-ssl-nginx.conf; # managed by Certbot
    ssl_dhparam /etc/letsencrypt/ssl-dhparams.pem; # managed by Certbot
}
server{
	server_name mahaljsp.ddns.net;
	root /server/wordpress;
	index index.php index.html;
	add_header X-Frame-Options SAMEORIGIN;
	location ~* \.(ico|css|js|gif|jpe?g|png|ogg|ogv|svg|svgz|eot|otf|woff)(\?.+)?$ {
		expires max;
		log_not_found off;
	}
	......

    listen [::]:443 ssl; # managed by Certbot
    listen 443 ssl; # managed by Certbot
    ssl_certificate /etc/letsencrypt/live/mahaljsp.asuscomm.com/fullchain.pem; # managed by Certbot
    ssl_certificate_key /etc/letsencrypt/live/mahaljsp.asuscomm.com/privkey.pem; # managed by Certbot
    include /etc/letsencrypt/options-ssl-nginx.conf; # managed by Certbot
    ssl_dhparam /etc/letsencrypt/ssl-dhparams.pem; # managed by Certbot
}
server {
	server_name  mahalpyweb.ddns.net;
	location / {
		proxy_pass http://localhost:7001;
		proxy_set_header Host $http_host;#將客戶端的 HOST 傳入 Django
		proxy_set_header X-Forwarded-For $proxy_add_x_forwarded_for;#將客戶 ip 傳入Django
	}
    listen [::]:443 ssl; # managed by Certbot
    listen 443 ssl; # managed by Certbot
    ssl_certificate /etc/letsencrypt/live/mahaljsp.asuscomm.com/fullchain.pem; # managed by Certbot
    ssl_certificate_key /etc/letsencrypt/live/mahaljsp.asuscomm.com/privkey.pem; # managed by Certbot
    include /etc/letsencrypt/options-ssl-nginx.conf; # managed by Certbot
    ssl_dhparam /etc/letsencrypt/ssl-dhparams.pem; # managed by Certbot
}
server{
    if ($host = mahaljsp.asuscomm.com) {
        return 301 https://$host$request_uri;
    } # managed by Certbot

	listen 80;
	listen [::]:80;
	server_name mahaljsp.asuscomm.com;
    return 404; # managed by Certbot
}
server{
    if ($host = mahaljsp.ddns.net) {
        return 301 https://$host$request_uri;
    } # managed by Certbot
	listen 80;
	listen [::]:80;
	server_name mahaljsp.ddns.net;
    return 404; # managed by Certbot
}
server {
    if ($host = mahalpyweb.ddns.net) {
        return 301 https://$host$request_uri;
    } # managed by Certbot
	listen 80;
	listen [::]:80;
	server_name  mahalpyweb.ddns.net;
    return 404; # managed by Certbot
}
certbot 只會更改原本是 80 port 的設定,如果原本的設定不是 80 port,就不會變更。
自動更新憑証
Let’s Encrypt 憑証有效日期只有三個月,所以使用 Linux 排程器 cron.d 每個月的 1 日 0:0 更新一次憑証,這樣就可以不用理會憑証是否到期。
請在 /etc/cron.d 新增 renewssl 檔案,內容如下。
0 0 1 * * root certbot renew --dry-run >> /home/thomas/renew_ssl.log
最後重啟 cron
sudo service cron reload
或是
sudo /etc/init.d/cron restart
或是
sudo systemctl restart cron
IP 分享器
ip 分享器 port forwarding 需將 443 port 指向伺服器的虛擬 ip。
Django CSRF
更改成 https 後,Django 的 CSRF 會一直無法驗証,需於 Django 的 settings.py 增加一行如下
CSRF_TRUSTED_ORIGINS = ["https://xxx.ddns.net"]
自行簽署 SSL 憑証 – 記錄用
不想使用第三方的 SSL 憑証,是可以自已簽署 SSL,不過客戶端還是會出現私人網站不安全的訊息,所以本段只是記錄而以,請不要跟著操作。
自行簽署的憑証的方法如下
sudo mkdir /etc/nginx/ssl

sudo openssl req -x509 -nodes -days 365 -newkey rsa:2048 -keyout /etc/nginx/ssl/nginx.key -out /etc/nginx/ssl/nginx.crt
然後依序如下填入相關訊息
Country Name (2 letter code) [AU]:TW
State or Province Name (full name) [Some-State]:Taiwan
Locality Name (eg, city) []:Changhua
Organization Name (eg, company) [Internet Widgits Pty Ltd]:MyCompany
Organizational Unit Name (eg, section) []:MyUnit
Common Name (e.g. server FQDN or YOUR name) []: mahaljsp.asuscomm.com
Email Address []:mahaljsp@gmail.com
將 /etc/nginx/sites-available/default 改成如下
server {
    listen 80;
    listen [::]:80;
    rewrite ^(.*) https://mahaljsp.asuscomm.com permanent;
}
server {
    listen 443 ssl;
    listen [::]:443 ssl;
    server_name mahaljsp.asuscomm.com;
    ssl_certificate /etc/nginx/ssl/nginx.crt;
    ssl_certificate_key /etc/nginx/ssl/nginx.key;
  ...
}
最後記得重啟 nginx
sudo systemctl restart nginx
上述 nginx 設定,會自動將 http 80 port 轉交 443 port,這樣客戶端輸入 http://mahaljsp.asuscomm.com 時,就不會出現找不到網頁的情形。
反向代理伺服器
情境
假設 80 port 指向 Windows 192.168.1.2,而 wordpress 架設在 Linux 192.168.1.5,那麼 wordpress 是無法被連線的,這時就需使用反向代理伺服器。
Linux
Linux 的 Nginx 是內部使用的,server_name 設定本地端的虛擬 ip 即可。
server{
        server_name 192.168.1.5;
        root /server/wordpress;
        index index.php index.html;
        add_header X-Frame-Options SAMEORIGIN;
        location ~* \.(ico|css|js|gif|jpe?g|png|ogg|ogv|svg|svgz|eot|otf|woff)(\?.+)?$ {
                expires max;
                log_not_found off;
        }
        location / {
                try_files $uri $uri/ /index.php?$args;
        }

        location ~* \.php$ {
                #include fastcgi_params;
                fastcgi_pass 127.0.0.1:9000;
                fastcgi_index index.php;
                fastcgi_split_path_info ^(.+\.php)(.*)$;
                include fastcgi_params;
                fastcgi_param SCRIPT_FILENAME $document_root$fastcgi_script_name;
            }
        location /files {
                alias /data/wp_download;
        }
        location /nginx_status {
                stub_status;
                allow 0.0.0.0;  # 只允許本機存取
                #deny all;
        }

    listen [::]:80;
    listen 80; # managed by Certbot
}
Windows
Windows 下的 Nginx 是負責對外溝通的,設定如下。
http {
    include       mime.types;
    default_type  application/octet-stream;
    sendfile        on;
    keepalive_timeout  65;
	server {
		listen 80;
		server_name mahaljsp.asuscomm.com;
		location / {
			proxy_pass http://192.168.1.5;
			proxy_set_header Host $host;
			proxy_set_header X-Real-IP $remote_addr;
			proxy_set_header X-Forwarded-For $proxy_add_x_forwarded_for;
			proxy_set_header X-Forwarded-Proto $scheme;
		}
	}
}
WordPress
WordPress 的 wp-options 資料表,siteurl 及 home 都要設定為 http://mahaljsp.asuscomm.com。
Cookie
瀏覽器的 Cookie 需要完全清除,不然會使用舊時的 Cookie 把 http 轉向 https 造成無法連線。
經過上述的設定後,就可以在瀏覽器輸入 http://mahaljsp.asuscomm.com 看到網頁。
SSL
SSL 要設定在 Windows 之下的 Nginx,因為是由 Windows 的 Nginx 負責對外溝通。
使用系統管理員開啟命令視窗,執行 ACME 的 wacs.exe。在驗証擁有者網域名稱 (verify that you are the owner of the domain names) 時,選 4. [http] Upload verification files via SSH-FTP。然後 path 輸入 sftp://192.168.1.5:22/server/wordpress。然後輸入登入 Linux 的帳號及密碼。
再度修改 Windows Nginx
加入 ssl 憑証後,要手動修改 Windows Nginx 如下
	server {
		#listen 80;
		listen 443 ssl;
		ssl_certificate e:/server/ssl/mahaljsp.asuscomm.com-chain.pem;
		ssl_certificate_key e:/server/ssl/mahaljsp.asuscomm.com-key.pem;
		server_name mahaljsp.asuscomm.com;
		location / {
			proxy_pass http://192.168.1.5;
			proxy_set_header Host $host;
			proxy_set_header X-Real-IP $remote_addr;
			proxy_set_header X-Forwarded-For $proxy_add_x_forwarded_for;
			proxy_set_header X-Forwarded-Proto $scheme;
			#proxy_set_header X-Forwarded-Proto https;
			#proxy_set_header X-Forwarded-Port 443;
		}
	}
	server {
		if ($host = mahaljsp.asuscomm.com) {
			return 301 https://$host$request_uri;
		}
			listen 80;
			listen [::]:80;
			server_name  mahaljsp.asuscomm.com;
		return 404; # managed by Certbot
	}
修改後重啟 Nginx,在瀏覽器輸入 https://mahaljsp.asuscomm.com 會看到整個網頁都亂掉了。
再度修改 WordPress
畫面會亂掉是因為 wordpress 的 siteurl 及 home 沒改到,二者都要設定為 https://mahaljsp.asuscomm.com。
修改完後,瀏覽器會出現過度轉向無法連線,這是因為 wordpress 不知自已以經是 https 了,一直在作重新導向到 https。
修改 WordPress wp-config.php
解決一直重新導向的問題,請開啟 Linux wordpress 下 wp-config.php 檔案,然後在 define( ‘WP_DEBUG’, false); 下方加入如下代碼。
define( 'WP_DEBUG', false);
if (isset($_SERVER['HTTP_X_FORWARDED_PROTO']) && $_SERVER['HTTP_X_FORWARDED_PROTO'] === 'https') {
    $_SERVER['HTTPS'] = 'on';
}
再次於瀏覽器測試,就可以看到正確的網頁了。
開機無法自動啟動
請注意, nginx使用atp安裝的話, 開機後是會自動啟動的. 如果沒有自動啟動, 是因為啟動失敗.
啟動失敗的原因, 除了設定錯誤外, 另一個最常看到的現像就是在vmware裏, 網頁根目錄採用外掛的方式外掛到windows. 因為外掛到windows的目錄, 需啟動vmtools, 再用mount –bind外掛.
nginx, php7.4-fpm的 rc3.d順序是S01, 如果把 mount –bind也改為S01, 這樣也是沒辨法的. 因為rc3.d的啟動順序採用多行程, 外掛要一段很長的時間.
解決的方式為在原生的ext4先建立空目錄, 如 /data/video, /date/video/web, /data/video/record, /data/video/web/live. 此時讓 nginx可以順利啟動.
後續 mount –bind慢慢掛上去後, nginx所需的內容也就會自動變更.
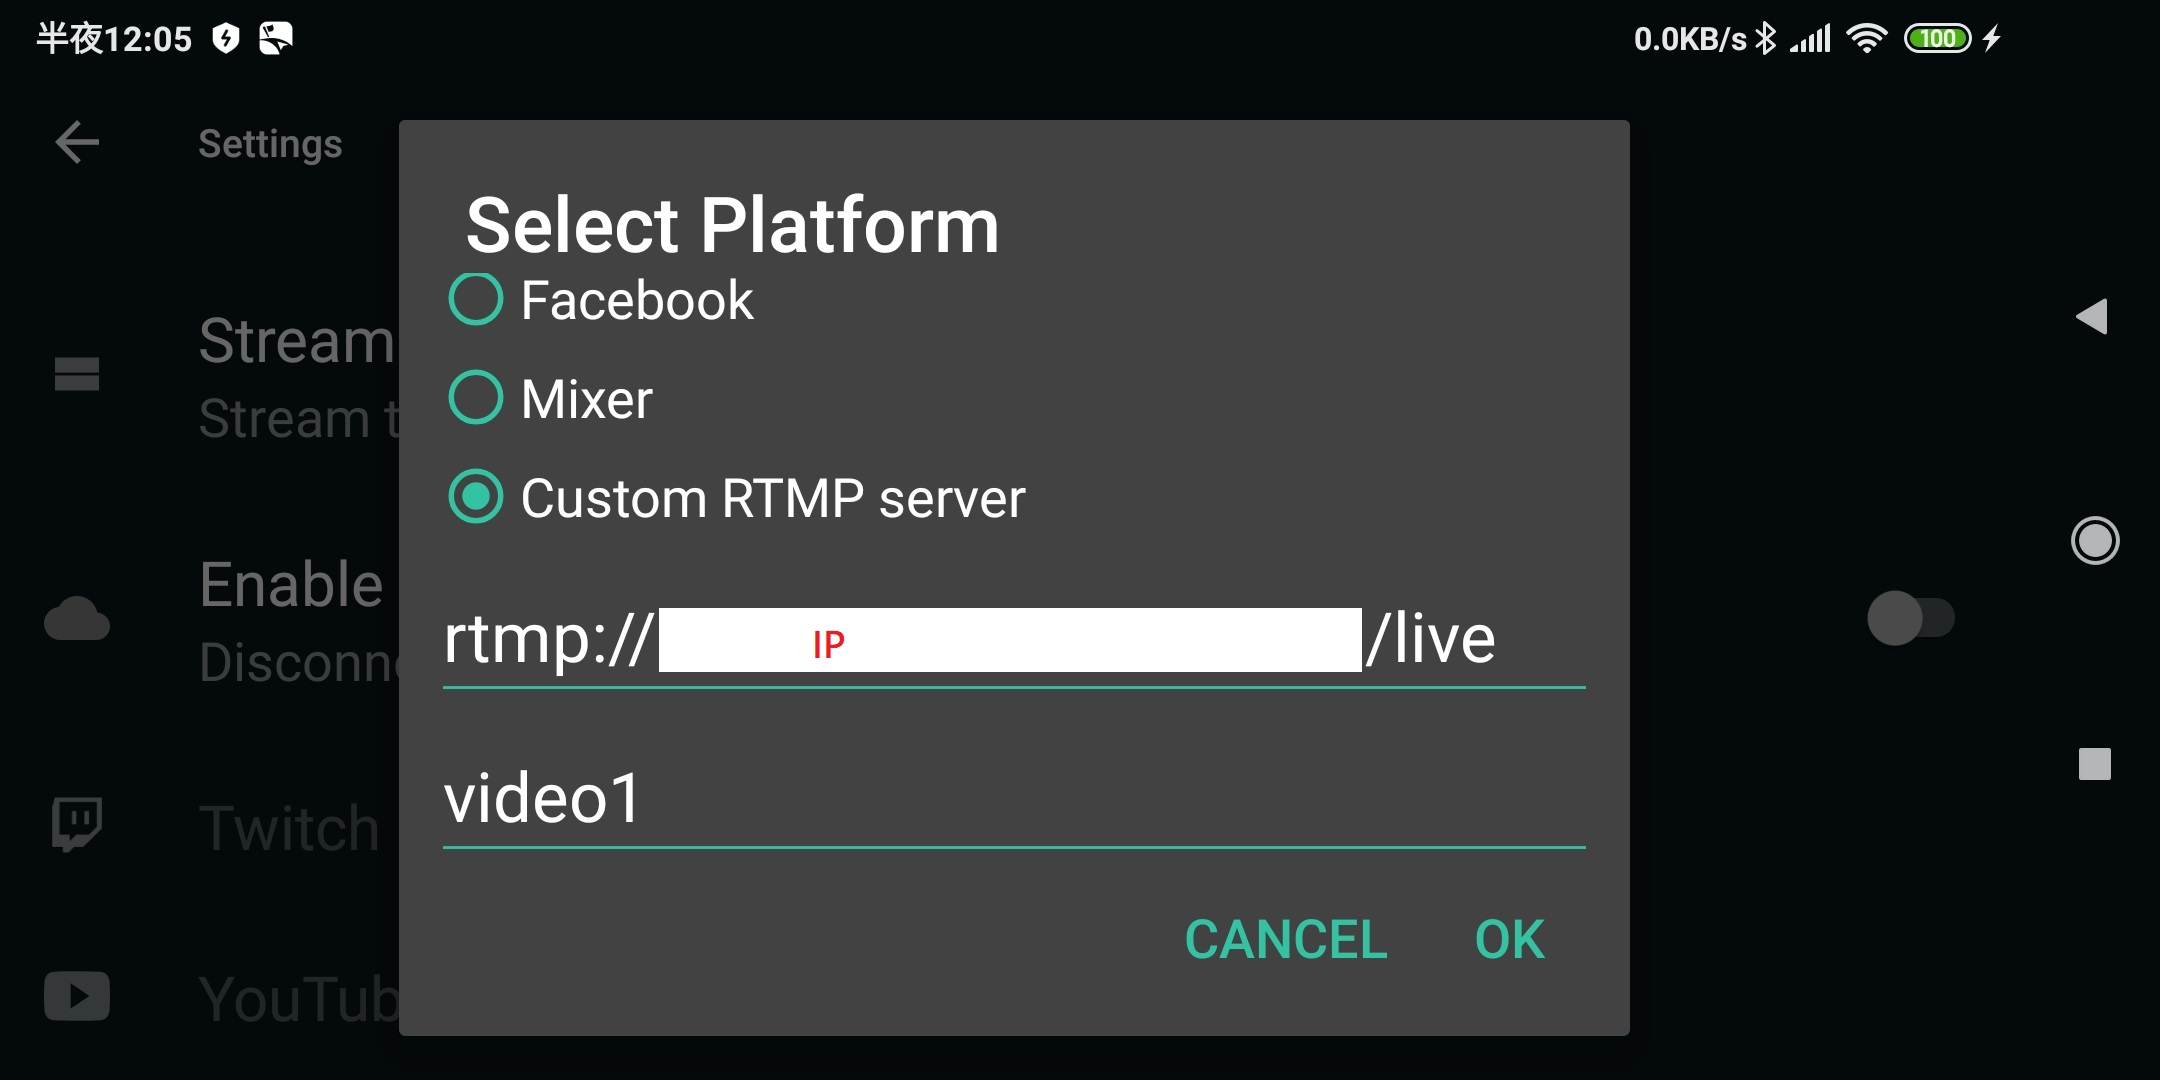
手機直播Streamlab
在手機上進入GooglePlay, 安裝Streamlab, 然後在Setting/Streaming platform, 輸入網址 rtmp://ip/live, 第二欄位輸入video1
手機開始直播後, 就會在 ubuntu伺服器的 /usr/local/nginx/html/hls/video1裏存放影片資料
手機直播CamON Live
此款app的廣告非常煩人, 不建議使用此軟体
手機直播Larix Broadcaster
此款app目前沒有廣告, 也支援推播到rtmp Server,建議使用此軟体
直播網頁撰寫
請在 /usr/local/nginx/html之下, 撰寫如下videolive.html
<html>
    <title>live</title>
    <body>
        <video id="video1" class="video-js vjs-default-skin" controls width="400" height="225"
            data-setup='{ "autoplay": true, "controls": true, "poster": "", "preload": "auto", "enterfullscreen": true }'>
            <source src="http://192.168.1.2/data/video1/index.m3u8" type="application/x-mpegURL">
        </video>
        <!--These three scripts aren't necessary for you to use videojs-contrib-hls -->
        <script src="https://ajax.googleapis.com/ajax/libs/jquery/1.11.2/jquery.min.js"></script>
        <script src="node_modules/bootstrap/dist/js/bootstrap.min.js"></script>
        <script src="js/ie10-viewport-bug-workaround.js"></script>

        <!-- videojs-contrib-hls setup --!>
        <!--Make sure to include the video.js CSS. This could go in the <head>, too. -->
        <link href="https://unpkg.com/video.js/dist/video-js.css" rel="stylesheet">
        <!--Include video.js and videojs-contrib-hls in your page -->
        <script src="https://unpkg.com/video.js/dist/video.js"></script>
        <script src="https://unpkg.com/videojs-flash/dist/videojs-flash.js"></script>
        <script src="https://unpkg.com/videojs-contrib-hls/dist/videojs-contrib-hls.js"></script>
        <script>
        </script>
    </body>
</html>
然後於瀏覽器輸入 http://192.168.1.2/videolive.html即可看到影像
video.js 7
上面網頁, 在需要直播的情形下, 需要多加入 videojs-contrib-hls.js, 但hls的專案已被棄用了, 改而使用videojs-http-streaming(VHS), 並且內建在video.js 7 的版本. 請參照https://github.com/videojs/videojs-contrib-hls 裏的說明
Notice: this project will be deprecated and is succeeded by videojs-http-streaming. VHS supports HLS and DASH and is built into video.js 7, see the video.js 7 blog post
下載video.js 7
video.js 7.7.5下載點
https://github.com/videojs/video.js/releases/tag/v7.7.5
video.js 7.0.0下載點
https://github.com/videojs/video.js/releases/tag/v7.0.0
下載 zip檔, 然後將解開的 .js檔及其子目錄 copy 到網頁伺服器根目錄下, 然後撰寫如下html檔
<html>
<head>
<!--
<meta http-equiv="refresh" content="60" />
-->
<meta http-equiv="Content-Type" content="text/html; charset=utf-8">
<link href="./v7/video-js.css" rel="stylesheet">
<script src="./v7/video.js"></script>
<style type="text/css">
#video1{
position:absolute;
top:0px;
left:0px;
<!--
width:335px;
height:100px;
overflow-y:hidden;
-->
z-index:0;
}
#showbox{
font-size: 16px;
color:#FFFFFF;
font-weight:bold;
position:absolute;
top:20px;
left:20px;
z-index:1;
}
#refresh{
position:fixed;
right:2px;
bottom:2px;
height:30px;
z-index:2;
overflow:hidden;
background: rgba(255, 255, 255, 0.3)
}
.vjs-default-skin { color: #fdfdfd; }
.vjs-default-skin .vjs-play-progress,
.vjs-default-skin .vjs-volume-level { background-color: #1880b8 }
.vjs-default-skin .vjs-control-bar { font-size: 100% }
</style>
<script language="JavaScript">
function ShowTime(){
var NowDate = new Date();
var year = NowDate.getFullYear();
var month = NowDate.getMonth();
var day = NowDate.getDate();
var h = NowDate.getHours();
var m = NowDate.getMinutes();
var s = NowDate.getSeconds();
if (month<10)month = "0"+month;
if (day<10)day = "0"+day;
if (h<10)h = "0"+h;
if (m<10)m = "0"+m;
if (s<10)s = "0"+s;
document.getElementById('showbox').innerHTML = year+"/"+month+"/"+day+" "+h+":"+m+":"+s+
"  Car:8888-WG";
setTimeout('ShowTime()',1000);
}
</script>
<title>live</title>
</head>
<body>
<!--vjs-default-skin-->
<div id="showbox"> </div>
<video id="video1" class="video-js vjs-default-skin vjs-big-play-centered" controls
crossorigin="use-credentials"
data-setup='{ "autoplay": true, "controls": true , "poster": "", "preload": "auto" }'>
<p class="vjs-no-vjs">Device don't connect</p>
</video>
<a href="#" onclick="javascript:window.location.reload()">
<button id="refresh">Refresh</button>
</a>
<script>
videojs('video1', {
controls:false,
muted: true,
fluid: true,
aspectRatio: "16:9",
requestFullScreen: true,
notSupportedMessage: "no connection",
sources: [{src:"http://ip/live/video1/index.m3u8",type:"application/x-mpegURL"}]
});
ShowTime();
</script>
</body>
</html>
撰寫mp4網頁
先將mp4影片copy到 html/data之下, 再於html編輯videomp4.html
<html>
    <head>
        <link href="https://vjs.zencdn.net/7.6.6/video-js.css" rel="stylesheet" />
        <!-- If you'd like to support IE8 (for Video.js versions prior to v7) -->
        <script src="https://vjs.zencdn.net/ie8/1.1.2/videojs-ie8.min.js"></script>
    </head>
    <body>
        <video id="my-video" class="video-js" controls preload="auto" width="640" height="480" poster="MY_VIDEO_POSTER.jpg"
           data-setup='{"autoplay": true, "controls": true, "poster": "", "preload": "auto"}'>
            <source src="./data/video1/a.mp4" type="video/mp4" />
            <source src="MY_VIDEO.webm" type="video/webm" />
            <p class="vjs-no-js">please enable JavaScript</p>
        </video>
        <script>
           var videoPlayer = videojs( "my-video" );
           videoPlayer.play();
        </script>
        <script src="https://vjs.zencdn.net/7.6.6/video.js"></script>
    </body>
</html>
然後在瀏覽器網址輸入 http://192.168.1.2/videomp4.html即可觀看影片
儲存路徑
直播影像可以儲存在Server裏, 在rtmp/server加入如下即可
record all;
record_path /record;
record_suffix -%Y-%m-%d-%T.flv
record_unique on;
日期格式請參考如下網站說明
https://pubs.opengroup.org/onlinepubs/009695399/functions/strftime.html
Issue
1. 網路斷線後, 客戶端無法自動連線 — 解決方案 : 使用 html 每1分鐘自動 refresh, 但會閃頻
2. 影片timestamp — survey
3. 檔案備份問題 — 解決方案 : server 加入 record 設定. 所以需教育人員如何使用 ftp
4. The media could not be loaded, either because the server or network failed or because the format is not supported. 修改成 “網路斷線, 請稍後”