
本篇使用 VSCode 說明猜拳遊戲視窗的製作步驟。完整專案請由如下網址下載。
VSCode 專案
在 VSCode 開啟新目錄,目錄名為 Game,Ctrl+Shift+p,選擇 Java: Create Java Project,選取 Gradle/Groovy。
build.gradle
在 app\build.gradle 修改成如下
plugins {
    id 'application'
    id 'org.openjfx.javafxplugin' version '0.1.0'
}

repositories {
    mavenCentral()
}

dependencies {
    testImplementation libs.junit.jupiter
    testRuntimeOnly 'org.junit.platform:junit-platform-launcher'
    implementation libs.guava
}

java {
    toolchain {
        languageVersion = JavaLanguageVersion.of(21)
    }
}

application {
    mainClass = 'net.ddns.mahaljsp.game.App'
}

tasks.named('test') {
    useJUnitPlatform()
}

javafx {
    version = "21"
    modules = [ 'javafx.controls', 'javafx.fxml' ]
}
jar {
    manifest {
        attributes(
            'Main-Class': 'net.ddns.mahaljsp.game.App'
        )
    }
}
test 錯誤
進入 app\src\test\java\game,將 AppTest.java 刪除
cache 錯誤
Gradle 9 版不支援 cache,所以請將 gradle.properties 裏的 cache 設定成 false。
org.gradle.configuration-cache=false
編譯
請在 Terminal 輸入如下指令進行編譯
gradle clean build
編譯後,會在 app\build\libs
UI 設計
使用 sense builder 設計如下畫面。
最上的「Thomas 猜拳遊戲」Label 想要擴展整個畫面的寬度,需把右方 Layout 頁面的 Hgrow 設定為 ALWAYS,然後把 Max Width 設為 MAX_VALUE,Max Height 則不用改。
完整的 fxml 請由如下網址下載 : main.fxml。
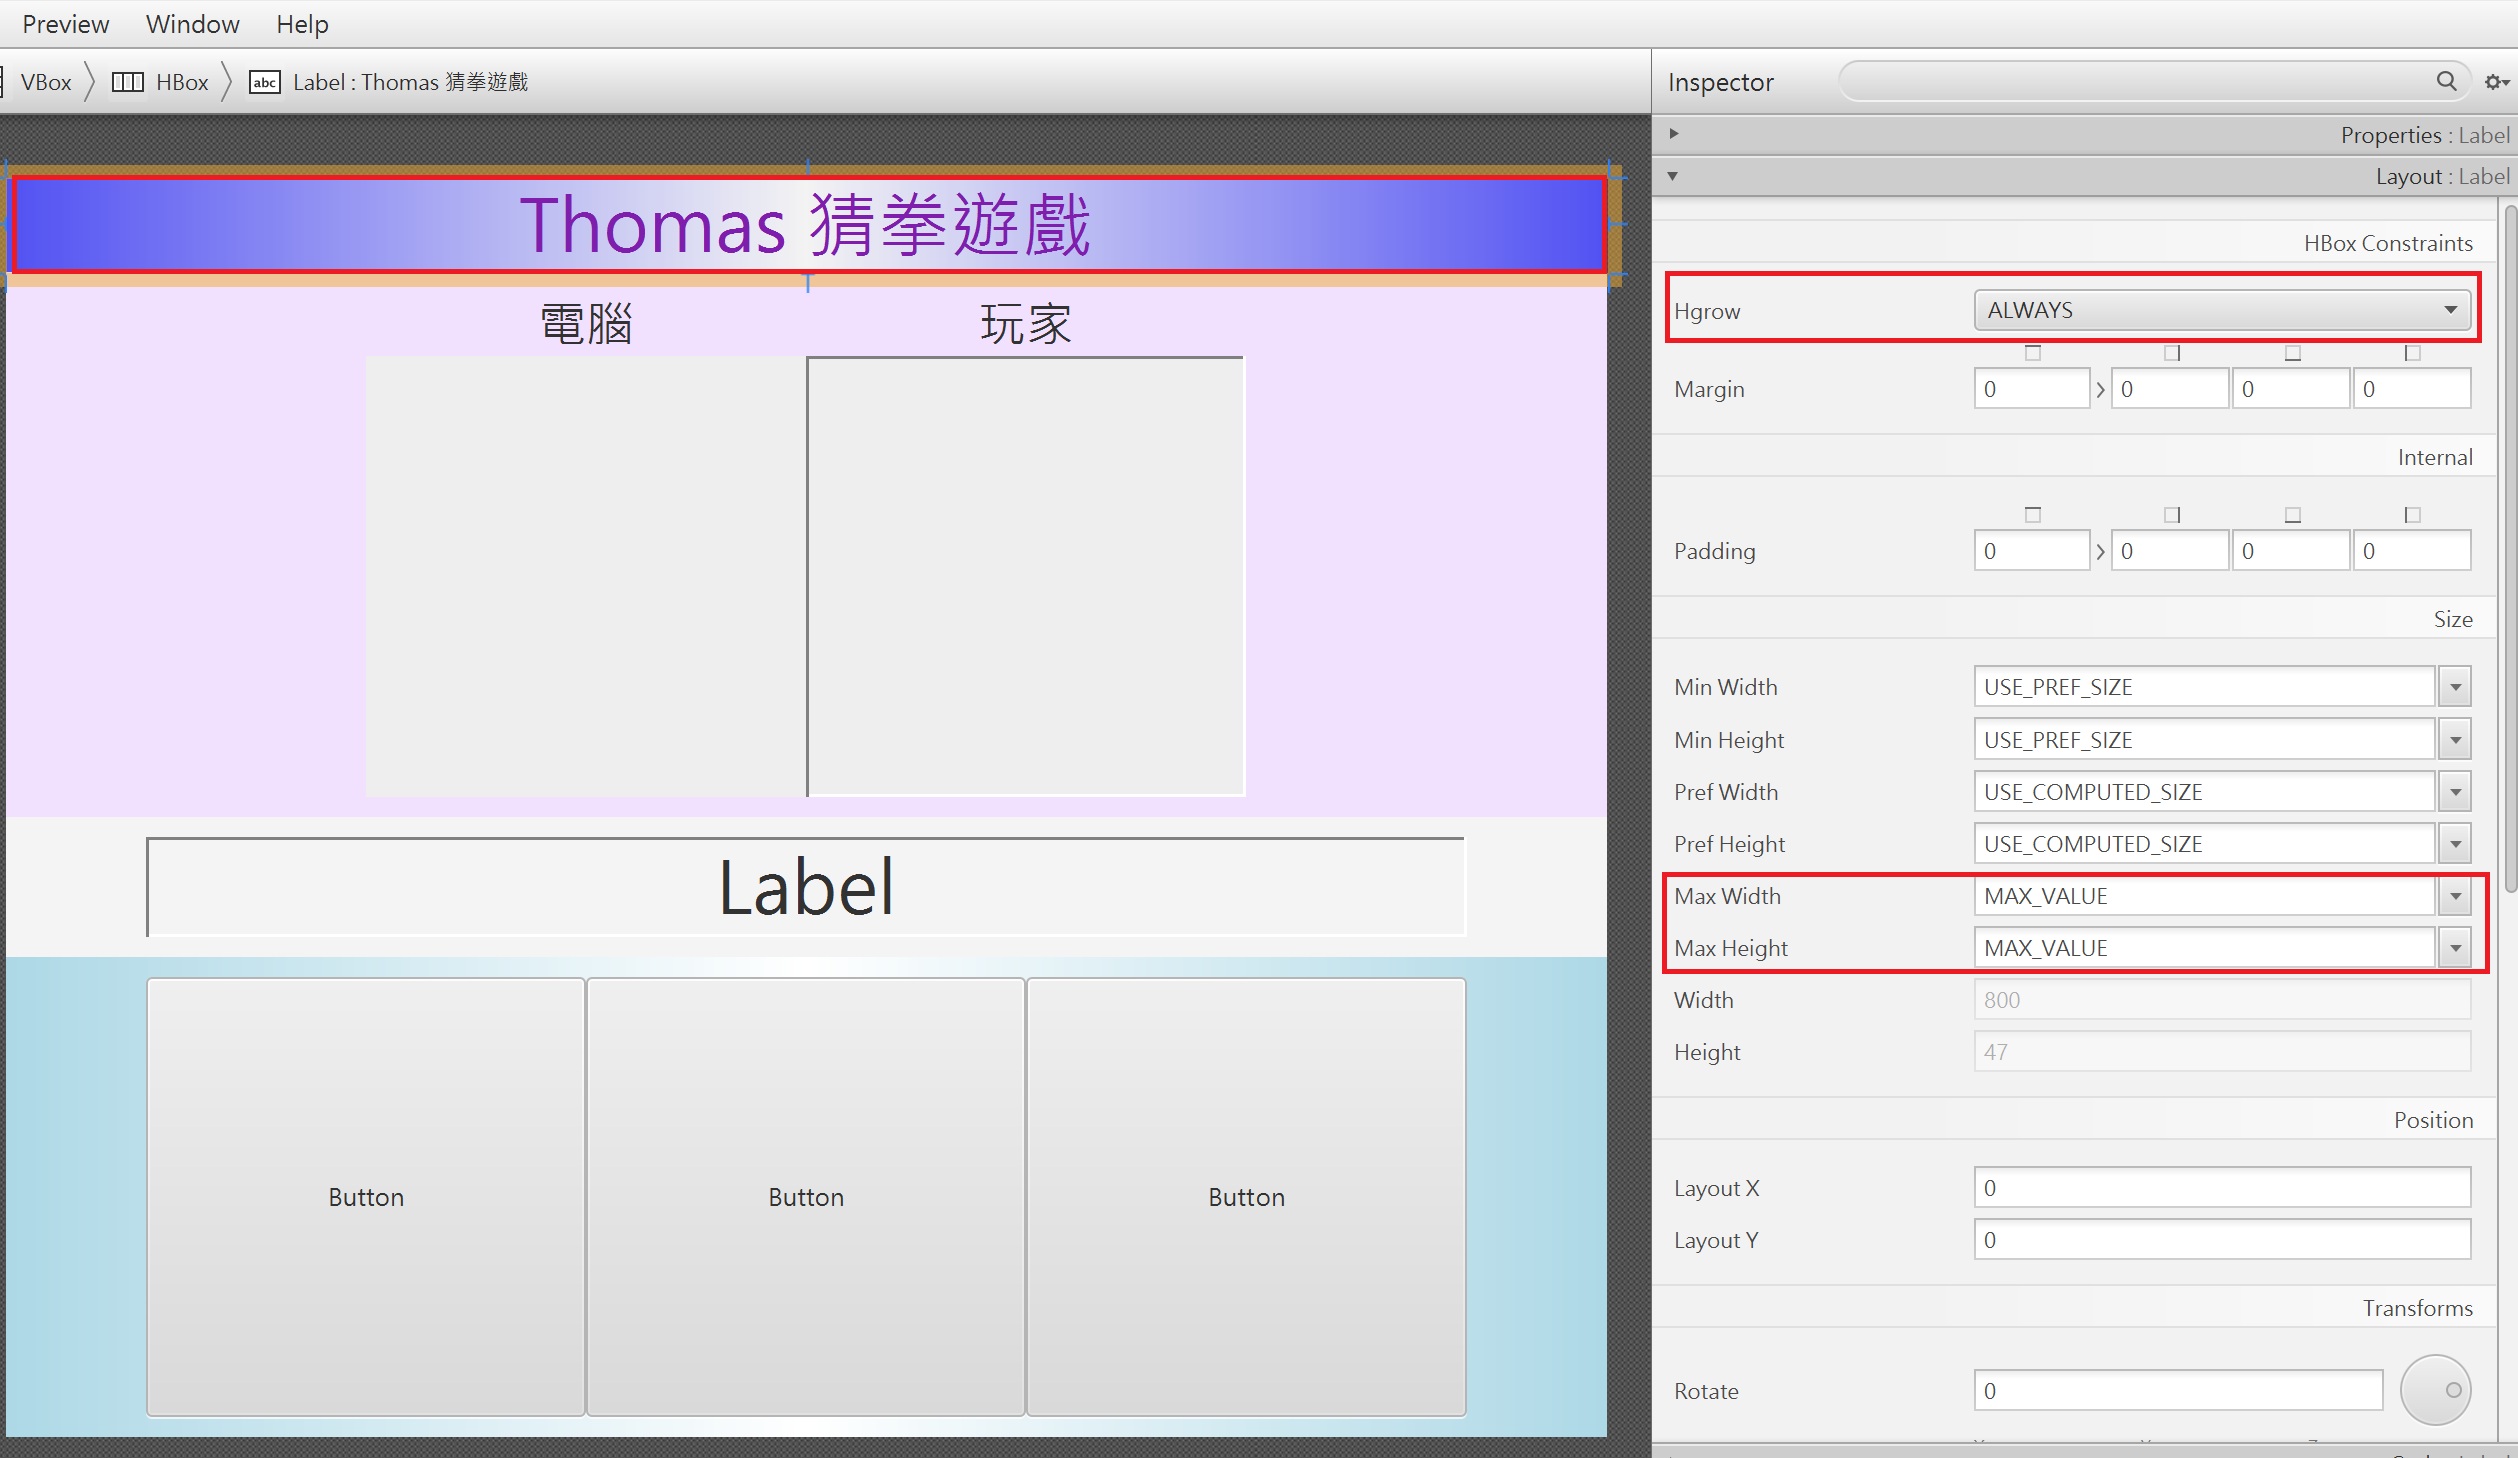
上述的 main.fxml 檔需儲存在專案下的 「app\src\main\resources\net\ddns\mahaljsp\game」目錄之下。
圖片下載
請將底下三張圖片下載儲存在專案下的 「app\src\main\resources\net\ddns\mahaljsp\game」目錄之下。



AppController
請在 app\src\main\java 下,新增 net\ddns\mahaljsp\game 目錄,然後新增 AppController.java,此檔記錄程式碼想要控制的元件之物件名稱。